Monday, July 4, 2011

4th of July Treat Bag Tutorial

** Click here for my A Muse Studio Creative Consultants July Blog Hop post. **
** Click here for my Young Crafters Unite Blog Hop post. **

Happy Fourth of July!

I'm taking a quick break from the festivities (our awesome hometown parade this morning, family picnic this afternoon) to share a quick and fun project with you. I am in love with these goody bags made from envelopes - they're so versatile for any celebration!


I used the supplies I still had on my desk from making my A Muse Studio blog hop project, and made a cute little rosette to go on the front.


And, just in case you aren't familiar with the technique for turning an envelope into a goody bag (I mean, come on. It's brilliant!) ... here's a quick video tutorial for you. Enjoy!


Saturday, July 2, 2011

July A Muse Studio Creative Consultant Blog Hop

** Looking for the Young Crafters Unite blog hop? Click here to see my post! **

Can you believe it's already July?! We have officially made it through half of 2011 - Wow! I hope you're having a great Independence Day Weekend. Thanks for joining us again this month for some amazing A Muse Studio inspiration!

You should have hopped over from Vanessa Buzard's blog. If not, please check out Samantha's blog to start at the beginning of the hop - You wouldn't want to miss out on any of the fun, would you? :)

Our theme this month is Red, White, and Blue. A fave color combination in this household year round! I'm especially drawn to less traditional takes on the combo - don't get me wrong, I love a good lipstick-white-cobalt, or cranberry-ivory-navy. But throw a little turquoise or coral into the mix? Yeah, that's the stuff!


So I decided to stray a little from my beaten path and whip up an invitation. I printed the party info on vellum (make sure to let it dry for a good long time so it won't smear!) and secured it with a cute grosgrain bow at the top.


I used masking and emboss resist on the cardstock under the vellum to create a subtle frame for the text.


I pulled out every color and pattern of red and blue A Muse cardstock and cut out a bunch of stars to layer. I don't have the A Muse Studio Star Trio dies (yet!) - so I hand cut all those stars! I think the end result was worth it. I also added some pearls and rhinestones that I colored with Copic markers.


Here's a little bit of a better view of the emboss resist frame. Cute, huh? :)

And now you're off to Lianne Vigil's blog! Have fun!

Supplies used in this card can be found at my A Muse Studio webstore.

Happy 4th! 


Friday, July 1, 2011

Young Crafters Unite! :)


Welcome Welcome Welcome to the Young Crafters Unite Blog Hop! Isn't this exciting? :)

If you're here from Jess Larsen's blog, then you're in the right place! If you've come across my blog by another way, I highly suggest you head on over to the Young Crafters Unite homepage and start at the beginning. This hop is huge and it's jam-packed with amazing talent. Plus, every comment you leave on the participating blogs (through July 4th) will increase your chances to win prizes from Lawn Fawn, Simon Says Stamp, and Paper Smooches. Sweet!

What makes me a Young Crafter is pretty much the obvious: I'm young, and I'm a crafter. I'm also still (yes, still) relatively new to the world of contemporary paper crafting, and I like to think of myself as something of an apprentice (in that I'm learning from them, not that I aspire to take over for them!) to "the greats," which, in my opinion, includes amazing ladies like Kristina Werner, Jennifer McGuire, Stephanie Howell, and Lisa Spangler (just to name a few!). 

For my hop project, I wanted to do something really exciting. (Well, ok, at least it's exciting to me. I hope you agree. lol.) The theme of the hop is My Favorite Things, and I have to admit I was a little bit stumped by this at first. My original plan was to wander around my craft space and choose, say, 10 of the items I'm loving the most lately, and then make a card with them. But I thought that might be too risky. So I decided to interpret the theme a little differently...

Let me be honest with you here for a moment. Lately, there have been a lot of things in my life that I'm not so thrilled about. But I'm working on it. I'm working on being happier, being more motivated, and enjoying my journey. And along with that theme, two of my favorite things right now are challenging myself and setting goals. So here are the challenges I set out to accomplish with this project:
     1. Document more of my everday life.
     2. Try out more scrapbooking.
     3. Use my Studio Calico kits.
     4. Allow a project to take more than one sitting. Don't feel the need to finish now, or rush through
         things.

So, without further ado (aka my propensity for blah blah blah), here's my project...


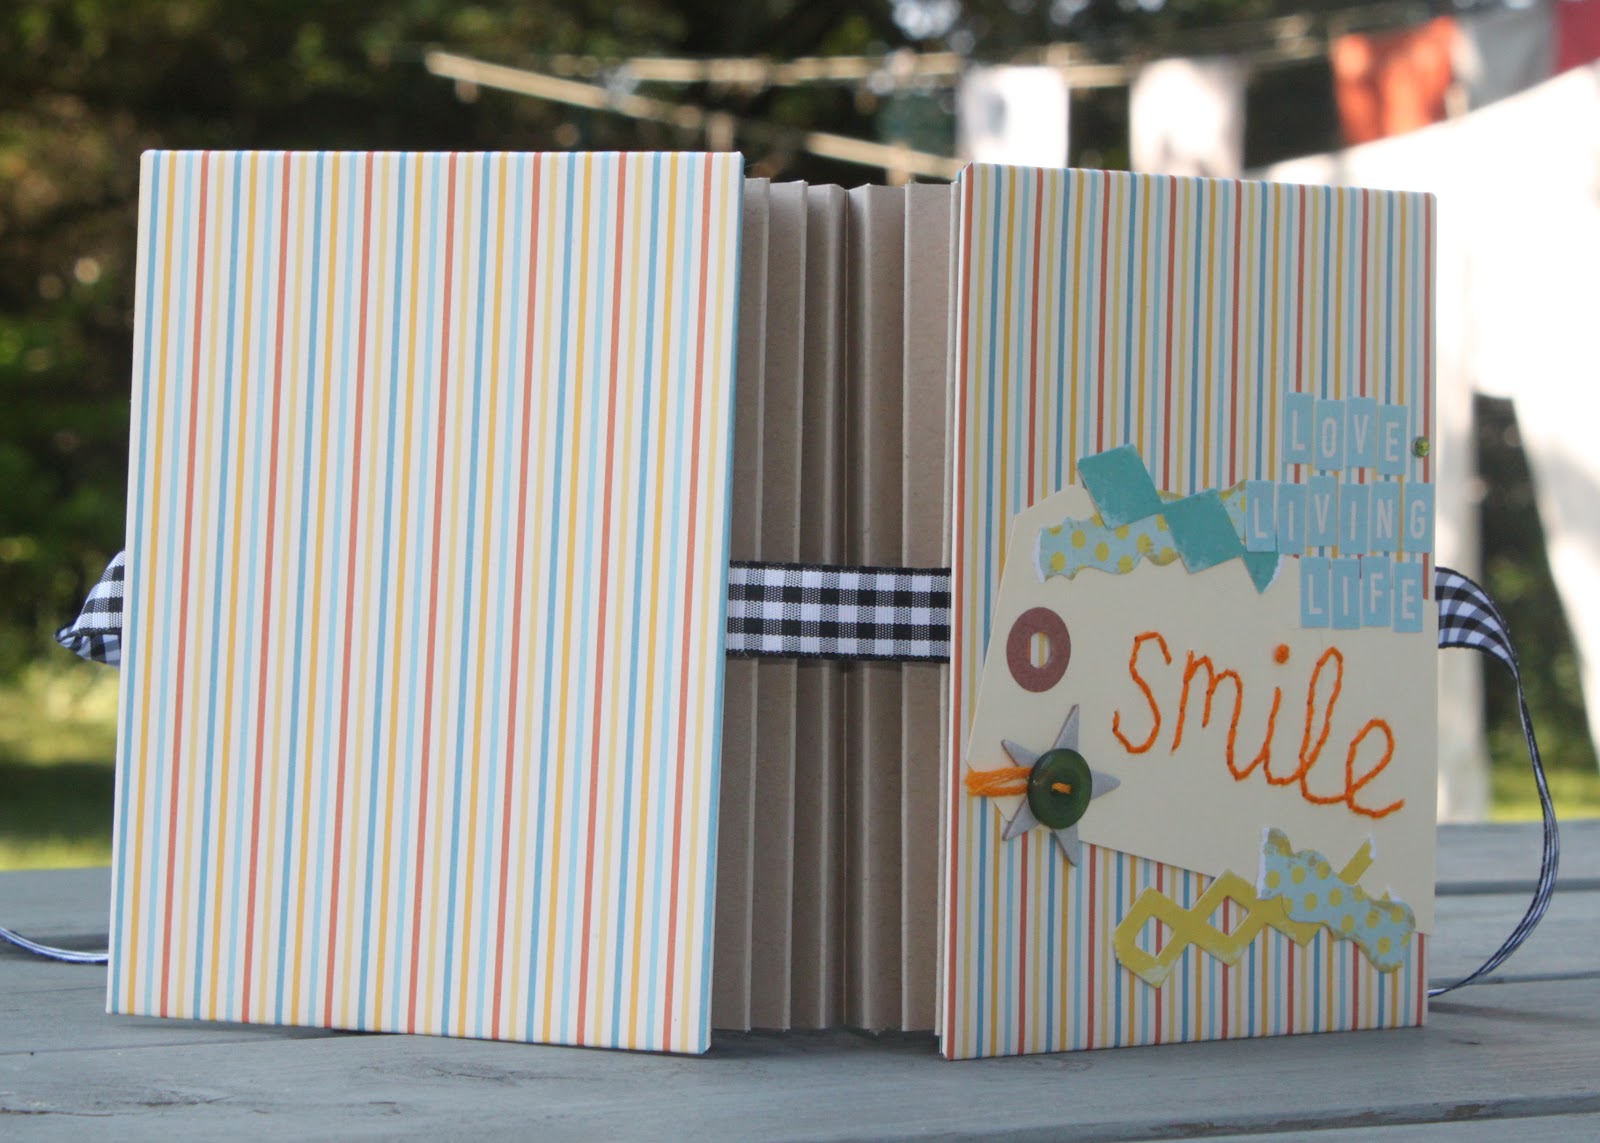
I'd seen a few of these accordion envelope mini-albums in various places online (most recently this beyond-amazing one that was featured on the October Afternoon blog), but I couldn't find a tutorial for them. So I decided to challenge myself to figure it out :)


Each "page" is an envelope where you can tuck photos, journaling, and memorabilia. The envelopes themselves are decorated, giving space to glue things in a more traditional scrapbook fashion.


I also made some little inserts to make more room for journaling, making lists, and gluing treasures.

Now, because I couldn't find a tutorial for this type of book, I decided to make one! Ok, two actually :) But since this has already been a very long post, and I'm sure you're anxious to get back a-hoppin', I'll let you know that the next stop on the hop is Brittney Baker's blog. I can't wait to see what she's created! And don't forget to comment along the way!

For those of you interested in how I made this mini-album, you can watch my videos below. Part 1 is about the inside, and Part 2 shows how I made the covers. Thanks for stopping by!


Monday, June 20, 2011

52 Lists, Week 2

{oops}

I guess I forgot to post my Week 2 List on Saturday, huh?

Oh well.

The Week 2 Theme was "things I learned from traveling." Well, I haven't had the good fortune to travel much - YET! - but I have spent at least a weekend in Maine pretty much every summer of my life. So I decided to use those trips as my inspiration.

Here's my list.


Wednesday, June 15, 2011

52 Weeks, 52 Lists

Hello friends!

I am SO excited to be sharing this project with you! Kellie over at On the Brink of Something Beautiful has started something awesome: a year in lists. One list a week for an entire year. Participants can link their lists to her blog, or post them in the flickr group. Every Sunday, Kellie or a guest blogger will post a prompt for that week's list. Some of them will be single-day lists, while others may be things you want to ruminate on and add to all week. For that reason, I will be posting my lists here every Saturday, at which point I will declare them "finished." :) I only found out about the challenge (which began on June 5) last weekend, so I did my first two lists in one day. If you haven't heard about this project yet, we're still only halfway through Week 2, so you've got plenty of time to jump on in!

Week 1: "Today I will..."


Enjoy the rest of your week! :)

Thursday, June 2, 2011

June Creative Consultant Blog Hop

It's that time again... another month! It's June and summer is a-comin' in! :)

If you've come from Sarah Callahan's blog - Welcome! If you've come here another way, I highly suggest you head over to Samantha Kania's blog to start at the beginning of the hop.

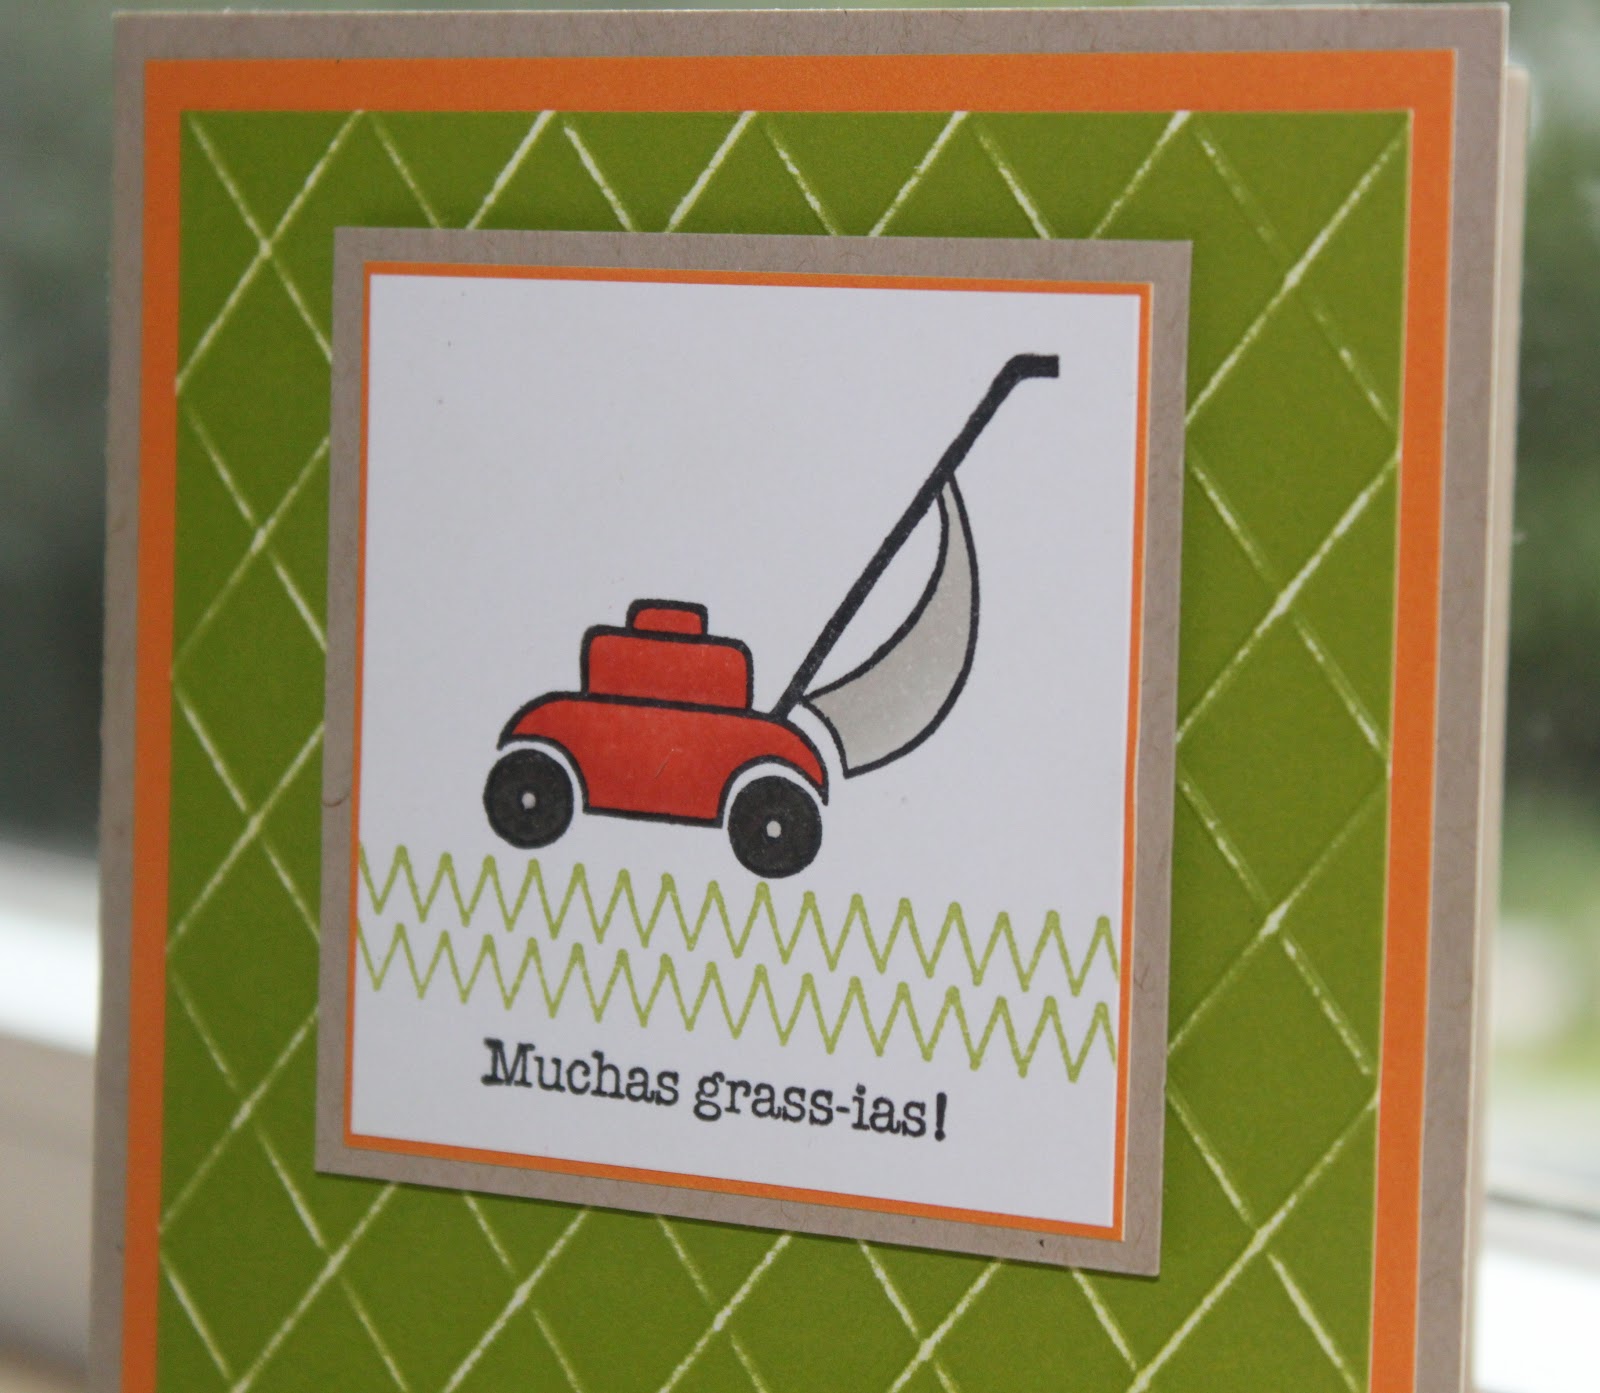
For this month's A Muse Studio Creative Consultant Blog Hop, the challenge was to create our own patterned paper. I showed you a card a little while back where I did this by stamping randomly all over a piece of cardstock, so I thought I'd do something a little different for this challenge. And, with Father's Day coming up, I wanted to make a masculine card.


I used my scoring board to score a line at every 1/2 inch on the diagonal of my cardstock, and then I flipped it around and scored the other way to create the lattice pattern. Then I took my sanding block and lightly sanded off the top layer of where the cardstock is raised from the scoring.


 You can also achieve a similar look by sanding over cardstock you've embossed using texture plates or embossing folders. A Muse Studio cardstock is so awesome for techniques like this because it has a white core. If you don't want the sanded areas to be white, you can always sponge ink over them or use a marker to color just those areas. (Jennifer McGuire did a really great video on this.)

Next on the hop is Kari Bell's blog. Go on ahead and check it out! I'll catch up with you soon; I can't wait to see what everyone else has made! :)

All the supplies used on this card project are from A Muse Studio, and can be purchased through my webstore at www.amusestudio.com/annakeyes.
- solid cardstock in Grass, Orange, Kraft, Sugar
- lawnmower and sentiment stamps from "Hey, Man"
- zig-zag border stamp from "Mad for Plaids"
- pigment ink in Grass
- Memento Tuxedo Black ink
- sanding block
- other: Copic markers, scoring board and stylus, dimensional adhesive

Enjoy the rest of your week!

Sunday, May 29, 2011

Video Tutorial: Thank You Berry Much

Hey there! Sorry about the lack of videos for the past two weeks! Sometimes life and inspiration just get away from you, ya know? :)

So anyway, this week I've got a start-to-finish card video featuring some new Papertrey Ink goodies: the berry Fruit Fusion set of stamps and dies. I made a cute little CAS summertime card to share with you.


I used a really fun "reverse die cutting" technique to highlight the berry and add a little dimension - which I think is the key to CAS design.


Watch the video below, or you can watch it on my YouTube channel.


Supplies: stamps - Fruit Fusion: Berry (Papertrey Ink); die - Fruit Fusion: Berry (Papertrey Ink); cardstock - Sugar (A Muse Studio); patterned paper - Basics White (Basic Grey), Cooped Up (Studio Calico); inks - Brick (Vivid), Old Olive (Stampin' Up!)

And here's another card I made in exactly the same way, except I made the berry by paper piecing two die cut strawberries. I also used one of the other sentiments in the set.


Here's a close-up of the strawberry. I just used the die to cut one berry shape out of the red paper, and another out of the green. Then I free-hand cut the leaves and used my Quickie Glue Pen to attach the green piece to the red piece.

Thanks for stopping by! Hope you're having a great Memorial Day Weekend! :)


Saturday, May 14, 2011

Sometimes the {stars} align

... and the perfect combination of inspiration comes into your life that just makes a project so much fun! :) That happened to me last week, when the A Muse Studio education director gave us Creative Consultants a challenge to use a recessed window on a card or project. (Check out her video project for the challenge.) In thinking about what I wanted to make for my window card, I remembered the Moxie Fab Tuesday Trigger that was posted this week. I'd also been wanting to try a really yummy-looking muffin recipe I'd seen, which led me to remember a post from Sue Plote of This Pink Rooster, in which she showed a cute box she made to deliver a homemade muffin to a friend. Instantaneous cartoon lightbulb above my head! :)

Here's the Tuesday Trigger photo - Don't you just need to go to Anthro now?? ;)
This skirt immediately reminded me of what a 1950s housewife might wear for a casual day at home. I was inspired by the thought of a lady at home, perfectly coiffed and pressed as they always are in the 50s movies! - cooking and cleaning and doing caring things for the people she loves. I was also inspired by the colors, although in my final card I punched the color scheme up and translated it into yellow, turquoise, and red gingham. But in my mind that seems perfectly 50s too.

And here's the resulting project...


I kind of cheated and made the window all the way through the front of my card, rather than using the recessed window technique on just the front. This is definitely a favorite technique of mine.


It's hard to see in the photo, but I clear-embossed some flowers along the side of the blue piece just to add a little extra detail to an otherwise plain and rather large expanse of cardstock.


P.S. Go make that muffin recipe. Seriously. Like right now. It is so good and it's Weight Watchers! And totally usable with any kind of fruit. :)


Wednesday, May 11, 2011

... and the winner is ...

Congratulations Laura!

Please send your mailing address to afkeyes@gmail.com

:)

Tuesday, May 10, 2011

a note about my new {venture}

I've said it before and I'll say it again.

I'm an A Muse Studio Creative Consultant. And I've been posting a lot of A Muse Studio projects since I signed on as a Creative Consultant in March.

But I care about you (yes, you), and I want to be honest with you about what this means for me.

Let's be honest. I want you to purchase A Muse Studio merchandise, and I want you to purchase it from me, because when you do, I make money. There I said it. (Not like you weren't thinking it!)

But... and this is a big one... That said, here are my promises to you, my blog reader and potential customer.

- I will not lie to you to make a sale. I worked at the Gap for a year. I was crap at it. I let people browse, and buy what they wanted, and sometimes I even let people leave empty handed. (gasp!) I want to let you make your own decisions and I won't pressure you to spend money you don't have on things you don't want. I still have a 9-5 job that pays my bills.
- I will review products honestly. If I say I love something, I really love it. (See above re: lying to make a sale) If there's a product I don't like, I either won't bring it up, or I'll be honest and say I don't really care for it!
- I'm not going to replace my entire craft room with A Muse Studio branded or approved products. (Don't you hate those people??) I can't afford it, and neither can you! I will keep using the tools that I love, and the tools that I have that I just kinda like, because I already have them. And I will remain loyal to all of my favorite companies, including A Muse Studio. I liked them before I became their salesperson.

So, I thank you for your ear. I do hope you will check out my webstore, honestly because A Muse is a great company with some of the cutest products out there. If you have questions about a specific product you see in my store, or about a technique you've seen or heard about, please ask! You may just see your question answered in an upcoming video tutorial! :)