Sunday, June 14, 2020

*tap tap tap* Is this thing on?

Wow! It's been a hot minute, hasn't it!? My creative life has gone in different directions in the past few years, with stamping and card making taking more and more of a back seat until, well... basically I don't do any paper crafts anymore. I'm still faithfully using (and loving) the Project Life App for our annual "family yearbook," and I haul everything out and try to remember how to scrapbook for a few weeks once a year to make a physical December Daily album. Over the past several years, my creative pursuits have been focused entirely on knitting. It was basically all I did during any moments of downtime, and nearly every evening was spent knitting for hours on end. Then somehow, over the course of 2018 and 2019, I found myself finishing fewer and fewer projects. More and more, my hours were being spent in front of my sewing machine, working on project bags for my Etsy shop, a handful of clothing items for Lyla, a few fun items for myself. During a lot of 2019, and all of 2020 so far, literally the only time I even picked up my knitting was at the weekly knitting night at the library.

At some point during the last year I decided I was going to take up quilting in earnest. I often listen to the American Patchwork & Quilting podcast in the car, and it seems that a common interview question is "When did you start quilting?" or "What was your first quilt?" Every time I hear it, I try to think how I would answer that question. And I honestly have no idea if I even could. I don't remember learning to sew (or learning to knit, for that matter) - It's just something that feels like I've always known the very basics of... but not much more than the very basics. I did take that quilting seminar in middle school with Mrs. Amaru. We traced cardboard squares onto fabric with Sharpies, sandwiched our quilts with cheap, fluffy polyester batting, and tied the layers together. It was fun, but I don't remember learning anything I didn't already know. (In fact, it's likely that I may have been a little bit of a know-it-all during that seminar.) Over the years, I'd made a bunch of quilted things here and there, but I'd never really made a quilt. And even though it happened within the past year, I don't really know when or why I made the decision to focus on quilting - And I can't really point to my first real quilt. But it's become basically my main focus now, and the way I spend nearly all of my "me time." So I decided to resurrect the ol' blog as a way to keep track of my quilting projects. (Tyler says I should find a partner who codes and create a Ravelry for quilters. LOL) So hello to you if you happen to be following along - Although really my intention is to create a record for myself, but I'm happy to have you if you're here. So... here we go!

Friday, August 14, 2015

Video Tutorial: Multi-Color Stamping with Sponge Daubers

Hey there! A while back, I posted a video on YouTube and I never got around to sharing it here. It's a tutorial on one of my favorite techniques - inking up a stamp with sponge daubers to get a multi-color image. This technique also gives you a great blended look. It works best on solid stamps with a lot of area, not line-art images. I used one of the new Hostess stamp sets called Silhouettes & Script. If you place a Stampin' Up! order of at least $150, this is one of the exclusive items you can choose as a Stampin' Rewards benefit.

Here's the card I share in the video...


And here's the technique!


There are a few other cards that I show in the video that I made using the same technique and stamp set. Here they are...


Hope you enjoy the video and that you give this technique a try! As always, holler if you have any questions.

Happy Stampin'! :)

Wednesday, August 12, 2015

Vintage-Inspired Baby Headband

Baby headbands have been trendy for a while now, and I have always loved them. So I bet you can imagine how excited I am to finally have a beautiful baby girl - who is, of course, very beautiful even without accessories - to wear headbands! :) I recently decided that I'm going to try my hand at making and selling headbands and highbrows for babies and little girls. I was able to execute one of my first ideas last night - which just so happens to use almost exclusively Stampin' Up! materials. 


I had so much fun making this headband for Lyla and I think it turned out so cute! She's not a huge fan of headbands, but I'm trying to have her wear them more often and I hope she'll come around. ;)


The Stampin' Up! supplies I used are Crumb Cake 1-1/4" Striped Grosgrain Ribbon, Tip Top Taupe 1" Dotted Lace Trim, Mint Macaron 1" Dotted Lace Trim, and a retired snowflake embellishment from last year's Holiday Catalog. But there are a lot of other buttons and things that would work, and there will be a new snowflake embellishment in this year's Holiday Catalog, starting on September 1st! :)


I also used champagne 5/8" fold over elastic from Elastic By The Yard, a marabou puff from Wholesale DeZigns on Etsy, and some felt from the fabric store. When I'm making my own flowers, I like to use Fabri-Tac from Beacon Adhesives, and I use hot glue to assemble the headband. 

Thanks for stopping by. I hope you have a great day! :)

Friday, June 26, 2015

Stampin' 101 Tutorial - Stamp-A-Ma-Jig Tool

I've gotten so many requests for a tutorial on using the Stamp-A-Ma-Jig tool. I've been meaning to make this video for ages, and I finally got it done! :)


The Stamp-A-Ma-Jig is one of my all-time favorite tools - I really don't think I could make a card without it. It's a stamp positioning system that allows you to see exactly where your image is going to stamp. It's especially useful for sentiments, and sets that involve layering stamps on top of one another to create a detailed image. (Stampin' Up! refers to this as "two step stamping," and these sets now tend to be photopolymer for easy lining up. But the Stamp-A-Ma-Jig is indispensable for older clear-mount or wood-mount two-step stamps.)

Another thing I love about the Stamp-A-Ma-Jig? It allows me to "try out" different positions for a stamp before I commit to anything on my card. Say I can't decide where I want my sentiment to be. Or maybe I stamped one flower, and I can't decide if I want a second flower to its right or its left. Since the Stamp-A-Ma-Jig imaging sheet is clear, I can move it around on my card to see exactly what my stamped image will look like in all the places I'm considering stamping it. Awesome! :)

So are you intrigued? Or maybe you're one of the folks who's always kind of wondered about the Stamp-A-Ma-Jig, but never really figured out what it's all about. Go ahead and check out my video demo below, or over on my YouTube channel. Let me know if you have any questions.


Oh, and by the way, here's the finished card that I'm working on in the video. It uses one of my favorite new sets, Garden in Bloom. The sentiments are from a super cute and clever set called Words of Truth. "I love you more than grilled cheese" is my favorite sentiment from this set! LOL.


Happy Stampin'! :)

Sunday, June 21, 2015

Start-to-Finish Sunday #42 - Watercolor Wings

Wait a minute. I know what you're thinking. Start-to-Finish Sunday?? Doesn't that mean a video??? Yes! My first STFS video since September! Baby Lyla actually let me get a ton of crafting the other day - including THREE videos! So stay tuned. :)

Today's card features one of the new sets from the 2015 Stampin' Up! catalog. It's called Watercolor Wings. Now, I'm not a big butterfly person, even though they're always really popular. But you guys know how much I like watercoloring, and anything that creates a watercolor look. This set fits that bill. It's made up of multiple images that you layer together to create really stunning butterflies. I love it for a tone-on-tone look with layered shades of the same color, but I'm also really excited to play with this set and try all sorts of color combinations. Which is where this card comes in!


This card was inspired by one that Alison Barclay shared on her blog. I immediately fell in love with this very unique color combination. I never would have thought to put Blushing Bride and Watermelon Wonder with Night of Navy - let alone combining them in one image. But I love it! (I also added a little bit of Smoky Slate.) The sentiment is from a stamp set called Hello Life.


In the video, I show you how to assemble the different stamps in this set to create these beautiful layered watercolor-look butterflies. You can check it out below, or over on my YouTube channel. Enjoy!


Happy Stampin'! :)

Friday, June 5, 2015

a belated introduction...


Lyla Rose
May 14, 2015
8:58 AM
4 lb. 10 oz.
18 inches 

She was born at 37 weeks via planned c-section. Thankfully, she did not need any interventions whatsoever and has been completely healthy and growing beautifully. The surgery was amazing and my recovery was uneventful and easy. We are settling into a routine at home - although she keeps us on our toes still! - and I'm grateful that daddy hasn't had to go back to work full-time yet. We're looking forward to this summer as a family of three!


Monday, March 30, 2015

Baby Thank You Cards

Hey all! Long time no see, huh? :) Sorry I've been MIA, and in fact it's been so long since I updated the old blog-o that I haven't shared some very big news with you all... I'm having a baby!! :-D It's a girl, and she'll be here around the end of May - 2 months to go! Hubby and I are very excited, and starting to get real preparations underway. My work colleagues have already thrown me a small but extremely thoughtful shower, and my "regular" shower is in a couple weeks, so I'm starting to think about designing thank you notes. Want to see what I've got so far?


This is the first one I made, and I was kind of playing around for a sketch challenge at the time. I will definitely not be making 30+ of this card! :-P We don't have a dedicated nursery space in our house, but for cohesion we're going for a yellow and gray color scheme with as many baby things as possible. And we've chosen elephant as Baby's signature animal. (Hope she likes them!) So for my cards I'm using Smoky Slate, So Saffron, and pops of Crisp Cantaloupe, seen here in the Sweet Dreams DSP and In Color Sequin. The adorable elephant stamp is from the Zoo Babies stamp set, and the sentiment is from Something to Say.


This card is way more mass-produce-able! :) So I think this is the idea I'll end up going with, but I want to rotate it to a horizontal card rather than vertical. Unfortunately, the Happy Heart embossing folder - which I adore - is vertical, so I'll have to choose a different embossing folder to add texture. Otherwise, the elements are really similar to the first card, but simplified. The elephant is matted onto some Dazzling Diamonds glimmer paper (love the redesign they did on the color of this stuff!) which is hard to see in the photo, but really pretty in real life. It adds some interest to what would otherwise be a lot of white space.

OK, well, that's it for me for today. Two cards, and some big news! :) I'll try to get some more posts up in the near future.

Happy Stampin'! :)

Sunday, December 14, 2014

An Easy and Adaptable Christmas Card

Funny story: I recently hosted my annual "Cocktails and Christmas Cards" workshop, and in trying to design 4 different cards that were appropriate for beginning stampers, I just could not for the life of me make anything in traditional red and green! Not that there's anything wrong with that... I love non-traditional colors for Christmas! :) But this card that I want to share with you is a variation on one of those workshop cards. It was also inspired by about 3 or 4 cards that I found on Pinterest, so I can't take all the credit. :)


This card comes together so easily and it's perfect for assembly-line style mass-producing. It's a great sort of rustic color combination thanks to the amazing new Kraft cardstock, plus Garden Green and Cherry Cobbler. I sponged the background with one of the stencils from the Hearts and Stars Decorative Masks and Whisper White craft ink. (Do your sponging on all your Kraft panels, then work on your embellishments while all the stars are drying.) The tree is from one of my favorite sets from the Holiday Catalog: Festival of Trees (it also comes in a bundle with the matching punch). A punched glimmer paper circle, a little Cherry Cobbler banner, a linen thread bow, and... done! The sentiment is from Ornamental Pine, and it's stamped in Chocolate Chip ink.


Now, let's say you're really in a hurry. Or maybe you want to keep your supply cost as low as possible. Check out this cute and extra super simple version of the same card.


This one saves a bunch of time by leaving off the glimmer paper circle - you can save time not having to punch or die cut all those circles. Now, I did want a little sparkle on this CAS version so I punched the star from the glimmer paper, but if you don't have it or don't want to buy it, the stamped star would look just as wonderful!


Happy Stampin'! :)

Monday, December 8, 2014

CCC#053: December Cards Challenge - Walking in a Winter Wonderland

CCC#053
December 2014 Cards Challenge
Walking in a Winter Wonderland

This month's card challenge marks my last challenge with Catherine and Cathy Create. We've had a great time bringing you fun projects and challenges to spark your creativity, but unfortunately, Catherine and Cathy - and all of us Design Team members, to be honest - have just gotten too busy with life to keep up! So sadly, the challenges will end with next week's December tags challenge. But we hope you'll continue to follow our individual blogs, as we'll all still be creating and sharing!

So this month's card challenge is all about winter... Snowflakes, snowmen, sledding - whatever makes you think of winter. So check out my fun and frosty (and super easy to duplicate!) card.


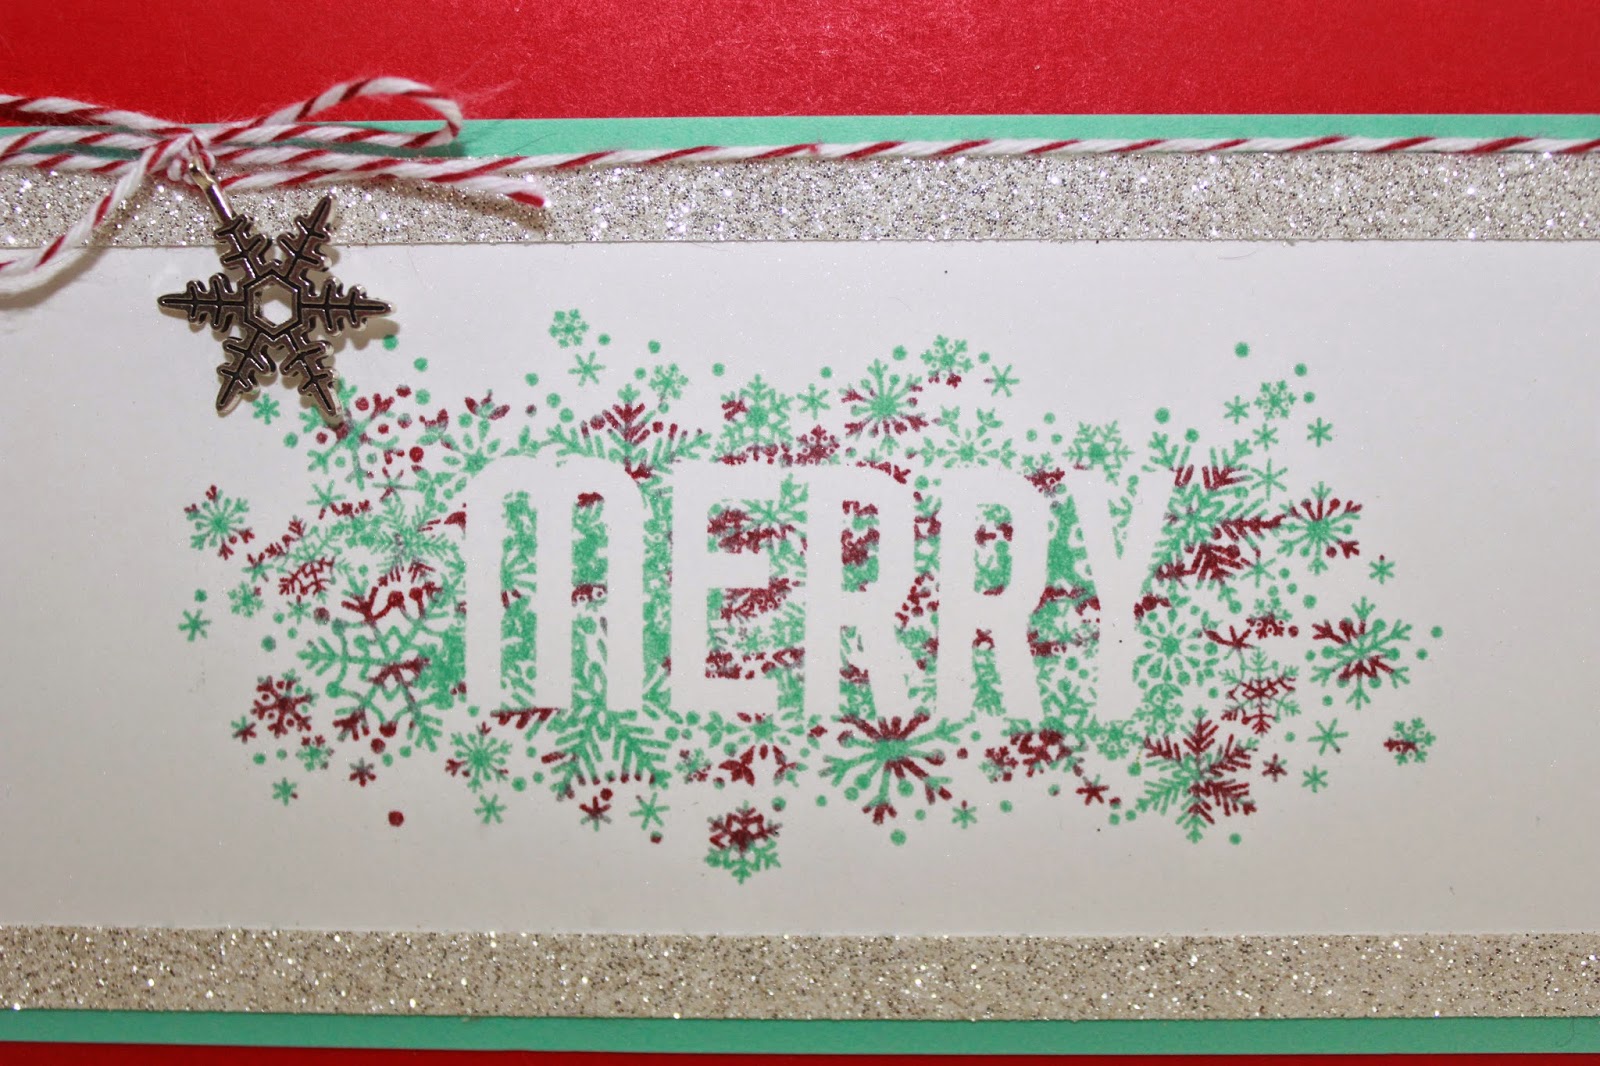
Red and aqua is one of my favorite color combinations of all time - especially for Christmas cards. And how fun do they look on this adorable snowflake stamp from the Seasonally Scattered stamp set?! I used a super fun and very easy technique called thumping to get the 2-color stamped image, and if you scroll all the way to the bottom of this post, you'll find a video tutorial on this technique.


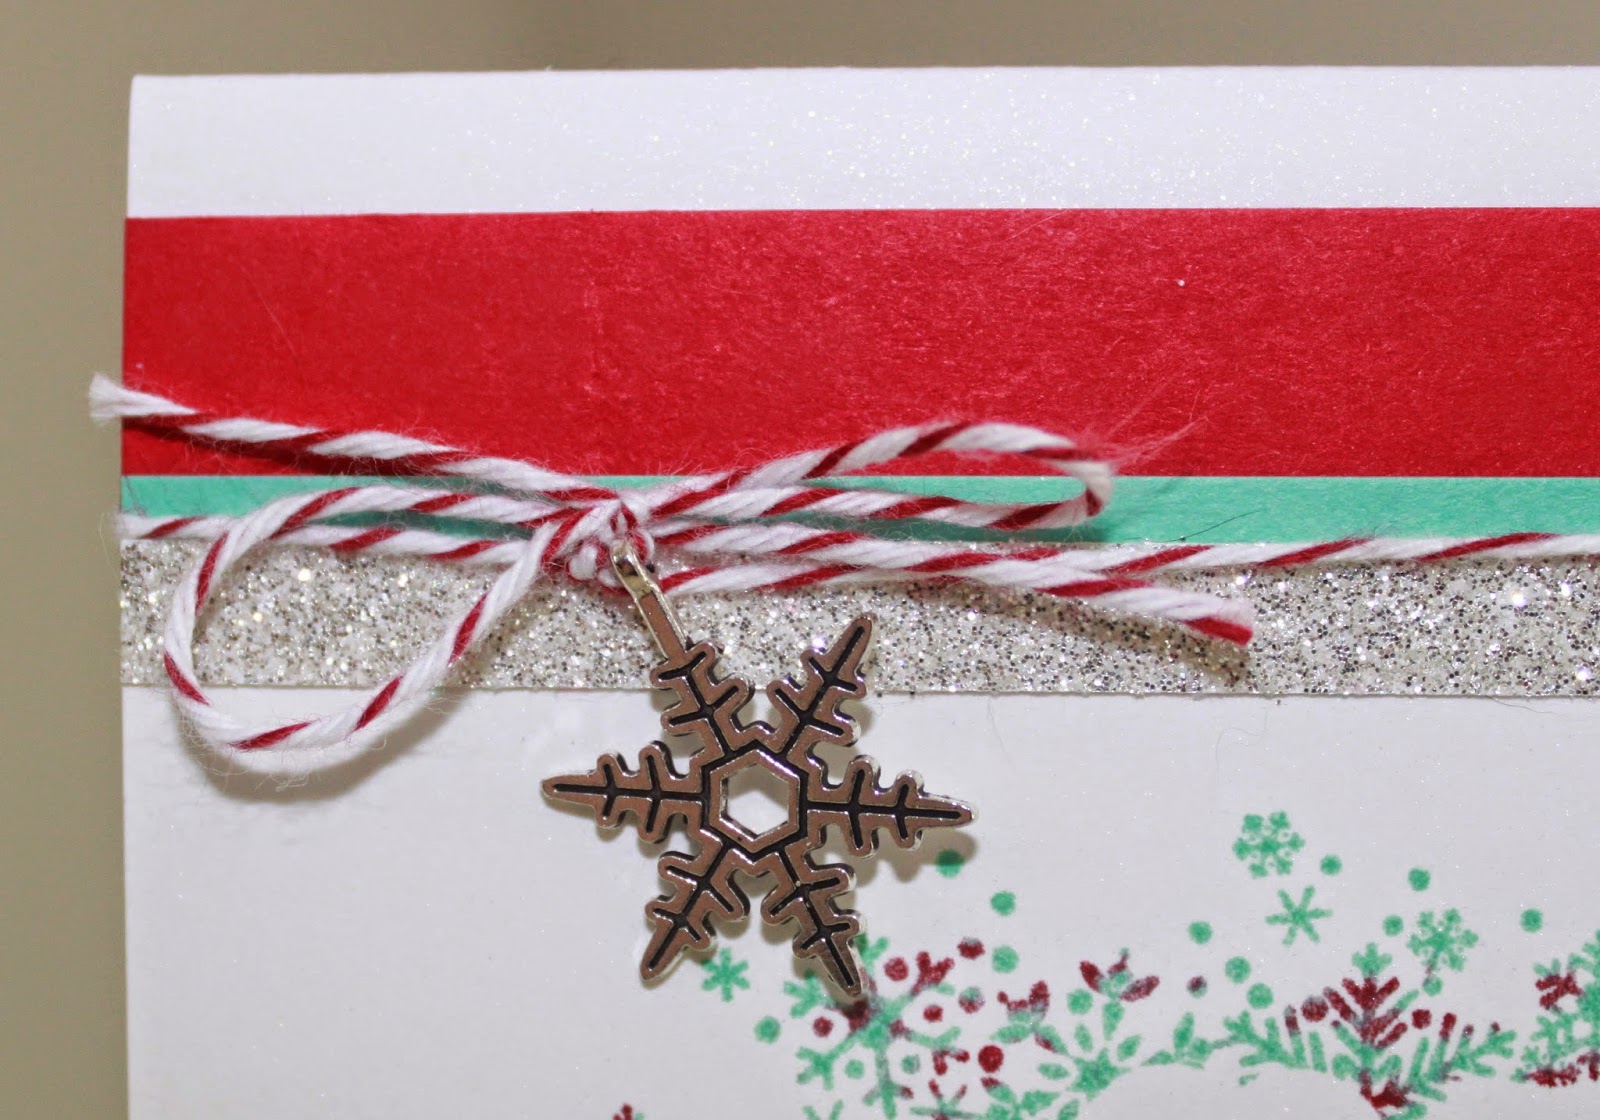
Then I just finished off the card with some simple layering, some twine and an adorable metal snowflake embellishment, and of course, some sparkle with glimmer paper. :) Easy and totally do-able if you want to make a whole bunch!


So I hope you'll take the time to stop by Catherine and Cathy Create and check out the other winter-themed cards. Thanks for stopping by today! Oh, and if you're interested in learning about the thumping technique for inking stamps, make sure you watch my quick video below.


Happy Stampin'! :)

Monday, December 1, 2014

CCC#052: December Monthly Challenge - Home for Christmas


CCC#052: December 2014 Monthly Challenge
Home for Christmas

December already! Does anyone know where 2014 has gone?? I'm having a hard time even entertaining the idea of Christmas, let alone actually preparing for it! :) But working on handmade Christmas projects sure does help get me in the holiday spirit!

The group challenge for December is to make a Christmas home decor item. I don't typically do a lot of non-card projects, and this one was a little open-ended for me. I have to admit, pretty much all of the credit for this idea goes to my dad. :) We were sitting around talking on Thanksgiving, and I mentioned I had to do this challenge project. So he started looking around the house and making suggestions. He makes these hand-carved wooden hearts that hang on the wall that we put lavender in, and suggested I make something similar out of paper. So that's what I did! 


This project was a little time-consuming, but very easy. I cut two of the largest die from the Hearts Framelits out of the brand new, totally awesome, heavier weight, kraft based Under the Tree DSP. I wanted to sew the two hearts together to make the pocket, but I don't currently have a functioning sewing machine, so I decided to do it by hand. That was the time-consuming part, but I just put on some of my favorite Christmas tunes and enjoyed the process. :) Plus, I think it really adds to the rustic look of the project.


To decorate the heart, I used a few of the elements from the Many Merry Stars kit. There are so many pieces in the kit that I'm not even going to notice a few of them missing when I go to put the stars together!


The sentiment is from the Many Merry Stars photopolymer stamp set. I stamped it in Real Red ink to match the Real Red satin woven ribbon. I also added a punched Real Red cardstock star and a little baker's twine bow (those didn't come from the kit).


I hung it from one of the knobs on my kitchen cabinets, and I think it looks adorable as-is or with a few sprigs of holly tucked inside. It would also be great to give to someone with a small gift (cash or jewelry would fit great - wink wink!) tucked inside.

I hope you enjoyed this project, and I encourage you to hop on over to Catherine and Cathy Create check out all the great inspiration for decorating your home this holiday season. If you're inspired to make a project of your own, make sure you link it up to the group post, because you could win a prize!

Happy Stampin'! :)