Showing posts with label CAS. Show all posts

Friday, June 26, 2015

Stampin' 101 Tutorial - Stamp-A-Ma-Jig Tool

I've gotten so many requests for a tutorial on using the Stamp-A-Ma-Jig tool. I've been meaning to make this video for ages, and I finally got it done! :)


The Stamp-A-Ma-Jig is one of my all-time favorite tools - I really don't think I could make a card without it. It's a stamp positioning system that allows you to see exactly where your image is going to stamp. It's especially useful for sentiments, and sets that involve layering stamps on top of one another to create a detailed image. (Stampin' Up! refers to this as "two step stamping," and these sets now tend to be photopolymer for easy lining up. But the Stamp-A-Ma-Jig is indispensable for older clear-mount or wood-mount two-step stamps.)

Another thing I love about the Stamp-A-Ma-Jig? It allows me to "try out" different positions for a stamp before I commit to anything on my card. Say I can't decide where I want my sentiment to be. Or maybe I stamped one flower, and I can't decide if I want a second flower to its right or its left. Since the Stamp-A-Ma-Jig imaging sheet is clear, I can move it around on my card to see exactly what my stamped image will look like in all the places I'm considering stamping it. Awesome! :)

So are you intrigued? Or maybe you're one of the folks who's always kind of wondered about the Stamp-A-Ma-Jig, but never really figured out what it's all about. Go ahead and check out my video demo below, or over on my YouTube channel. Let me know if you have any questions.


Oh, and by the way, here's the finished card that I'm working on in the video. It uses one of my favorite new sets, Garden in Bloom. The sentiments are from a super cute and clever set called Words of Truth. "I love you more than grilled cheese" is my favorite sentiment from this set! LOL.


Happy Stampin'! :)

Sunday, June 21, 2015

Start-to-Finish Sunday #42 - Watercolor Wings

Wait a minute. I know what you're thinking. Start-to-Finish Sunday?? Doesn't that mean a video??? Yes! My first STFS video since September! Baby Lyla actually let me get a ton of crafting the other day - including THREE videos! So stay tuned. :)

Today's card features one of the new sets from the 2015 Stampin' Up! catalog. It's called Watercolor Wings. Now, I'm not a big butterfly person, even though they're always really popular. But you guys know how much I like watercoloring, and anything that creates a watercolor look. This set fits that bill. It's made up of multiple images that you layer together to create really stunning butterflies. I love it for a tone-on-tone look with layered shades of the same color, but I'm also really excited to play with this set and try all sorts of color combinations. Which is where this card comes in!


This card was inspired by one that Alison Barclay shared on her blog. I immediately fell in love with this very unique color combination. I never would have thought to put Blushing Bride and Watermelon Wonder with Night of Navy - let alone combining them in one image. But I love it! (I also added a little bit of Smoky Slate.) The sentiment is from a stamp set called Hello Life.


In the video, I show you how to assemble the different stamps in this set to create these beautiful layered watercolor-look butterflies. You can check it out below, or over on my YouTube channel. Enjoy!


Happy Stampin'! :)

Monday, March 30, 2015

Baby Thank You Cards

Hey all! Long time no see, huh? :) Sorry I've been MIA, and in fact it's been so long since I updated the old blog-o that I haven't shared some very big news with you all... I'm having a baby!! :-D It's a girl, and she'll be here around the end of May - 2 months to go! Hubby and I are very excited, and starting to get real preparations underway. My work colleagues have already thrown me a small but extremely thoughtful shower, and my "regular" shower is in a couple weeks, so I'm starting to think about designing thank you notes. Want to see what I've got so far?


This is the first one I made, and I was kind of playing around for a sketch challenge at the time. I will definitely not be making 30+ of this card! :-P We don't have a dedicated nursery space in our house, but for cohesion we're going for a yellow and gray color scheme with as many baby things as possible. And we've chosen elephant as Baby's signature animal. (Hope she likes them!) So for my cards I'm using Smoky Slate, So Saffron, and pops of Crisp Cantaloupe, seen here in the Sweet Dreams DSP and In Color Sequin. The adorable elephant stamp is from the Zoo Babies stamp set, and the sentiment is from Something to Say.


This card is way more mass-produce-able! :) So I think this is the idea I'll end up going with, but I want to rotate it to a horizontal card rather than vertical. Unfortunately, the Happy Heart embossing folder - which I adore - is vertical, so I'll have to choose a different embossing folder to add texture. Otherwise, the elements are really similar to the first card, but simplified. The elephant is matted onto some Dazzling Diamonds glimmer paper (love the redesign they did on the color of this stuff!) which is hard to see in the photo, but really pretty in real life. It adds some interest to what would otherwise be a lot of white space.

OK, well, that's it for me for today. Two cards, and some big news! :) I'll try to get some more posts up in the near future.

Happy Stampin'! :)

Sunday, December 14, 2014

An Easy and Adaptable Christmas Card

Funny story: I recently hosted my annual "Cocktails and Christmas Cards" workshop, and in trying to design 4 different cards that were appropriate for beginning stampers, I just could not for the life of me make anything in traditional red and green! Not that there's anything wrong with that... I love non-traditional colors for Christmas! :) But this card that I want to share with you is a variation on one of those workshop cards. It was also inspired by about 3 or 4 cards that I found on Pinterest, so I can't take all the credit. :)


This card comes together so easily and it's perfect for assembly-line style mass-producing. It's a great sort of rustic color combination thanks to the amazing new Kraft cardstock, plus Garden Green and Cherry Cobbler. I sponged the background with one of the stencils from the Hearts and Stars Decorative Masks and Whisper White craft ink. (Do your sponging on all your Kraft panels, then work on your embellishments while all the stars are drying.) The tree is from one of my favorite sets from the Holiday Catalog: Festival of Trees (it also comes in a bundle with the matching punch). A punched glimmer paper circle, a little Cherry Cobbler banner, a linen thread bow, and... done! The sentiment is from Ornamental Pine, and it's stamped in Chocolate Chip ink.


Now, let's say you're really in a hurry. Or maybe you want to keep your supply cost as low as possible. Check out this cute and extra super simple version of the same card.


This one saves a bunch of time by leaving off the glimmer paper circle - you can save time not having to punch or die cut all those circles. Now, I did want a little sparkle on this CAS version so I punched the star from the glimmer paper, but if you don't have it or don't want to buy it, the stamped star would look just as wonderful!


Happy Stampin'! :)

Monday, December 8, 2014

CCC#053: December Cards Challenge - Walking in a Winter Wonderland

CCC#053
December 2014 Cards Challenge
Walking in a Winter Wonderland

This month's card challenge marks my last challenge with Catherine and Cathy Create. We've had a great time bringing you fun projects and challenges to spark your creativity, but unfortunately, Catherine and Cathy - and all of us Design Team members, to be honest - have just gotten too busy with life to keep up! So sadly, the challenges will end with next week's December tags challenge. But we hope you'll continue to follow our individual blogs, as we'll all still be creating and sharing!

So this month's card challenge is all about winter... Snowflakes, snowmen, sledding - whatever makes you think of winter. So check out my fun and frosty (and super easy to duplicate!) card.


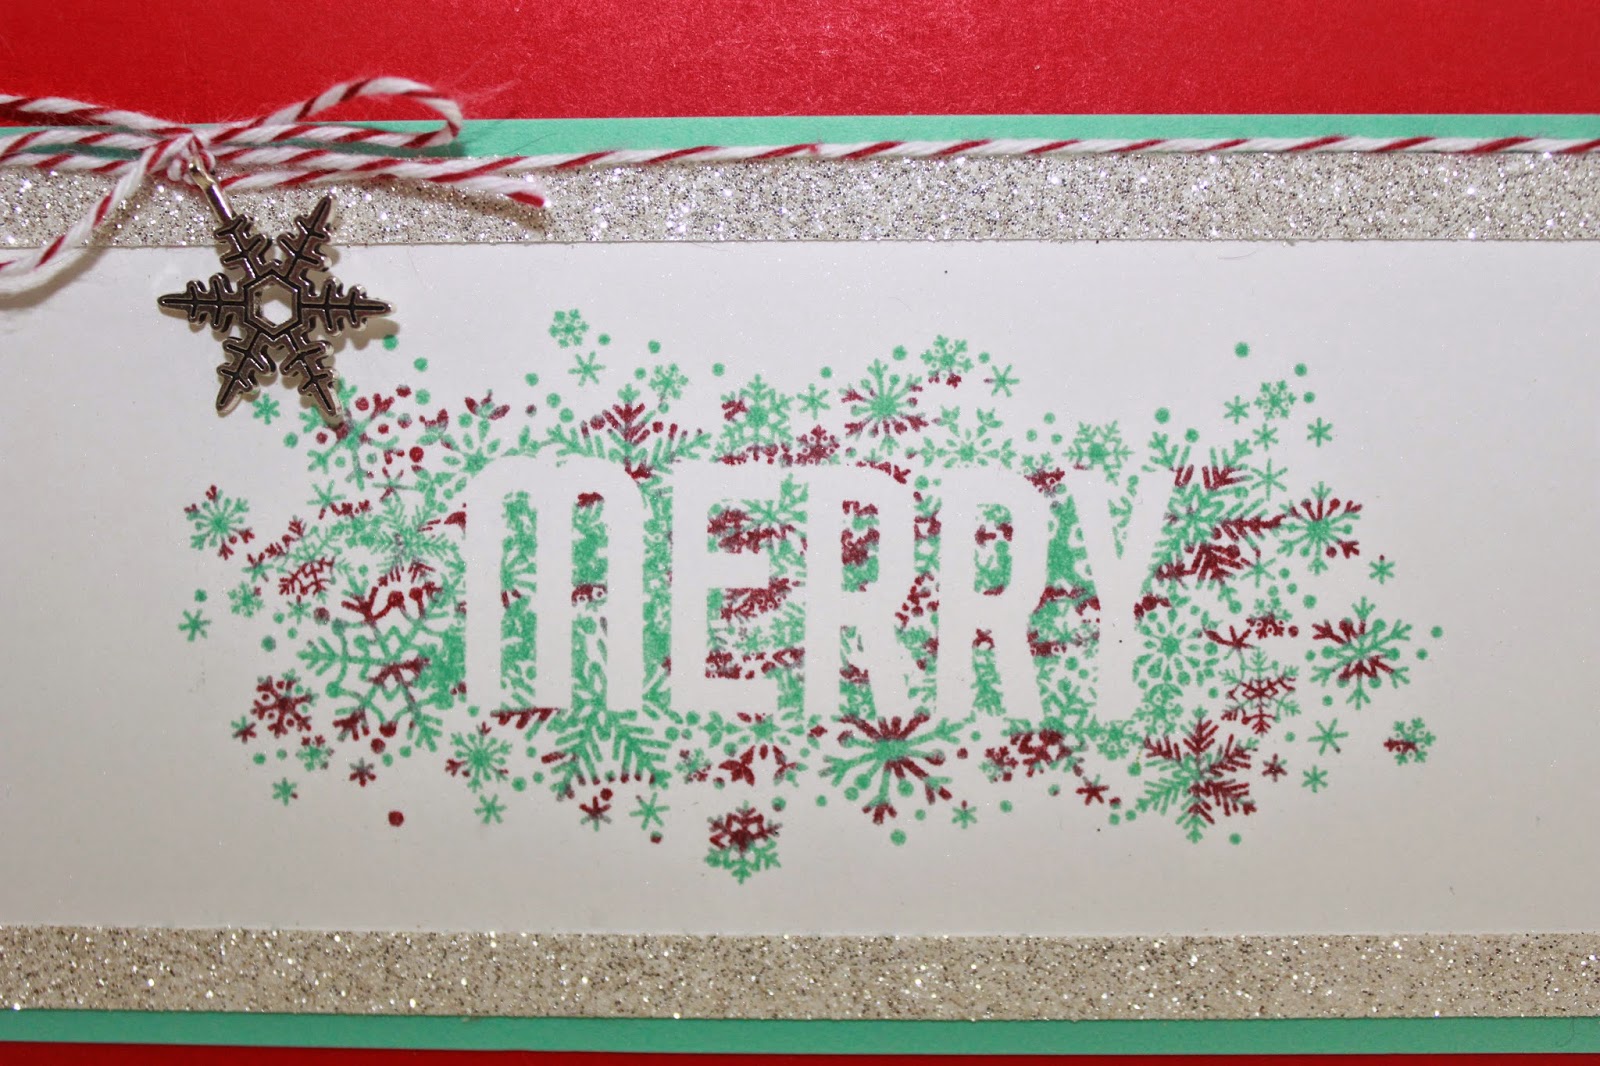
Red and aqua is one of my favorite color combinations of all time - especially for Christmas cards. And how fun do they look on this adorable snowflake stamp from the Seasonally Scattered stamp set?! I used a super fun and very easy technique called thumping to get the 2-color stamped image, and if you scroll all the way to the bottom of this post, you'll find a video tutorial on this technique.


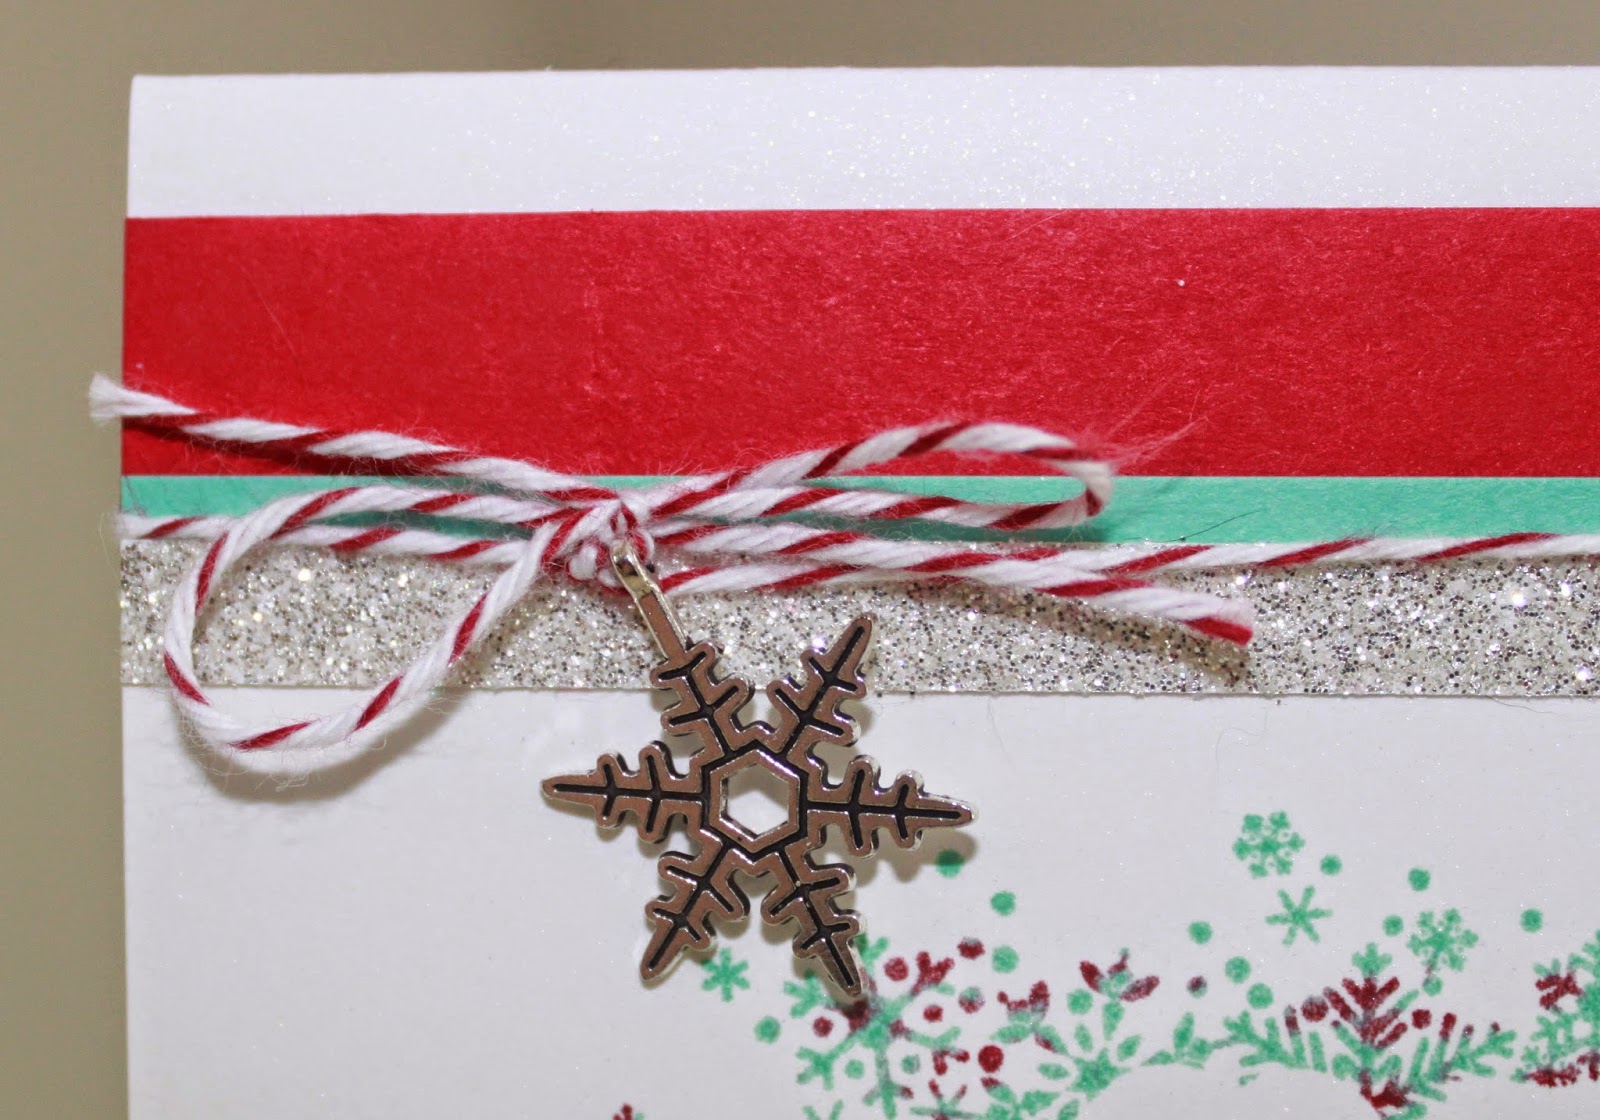
Then I just finished off the card with some simple layering, some twine and an adorable metal snowflake embellishment, and of course, some sparkle with glimmer paper. :) Easy and totally do-able if you want to make a whole bunch!


So I hope you'll take the time to stop by Catherine and Cathy Create and check out the other winter-themed cards. Thanks for stopping by today! Oh, and if you're interested in learning about the thumping technique for inking stamps, make sure you watch my quick video below.


Happy Stampin'! :)

Friday, November 7, 2014

CCC#050: November 2014 Cards Challenge - Delighted with DSP!

CCC#050: November 2014 Cards Challenge
Delighted with DSP!

The Cards Challenge for this month is a fun one: Use your favorite DSP! :) But before I share my card, I have a confession. I am a DSP hoarder! I can't resist buying it, I love flipping through the packages, I love being inspired by its color combinations... but I so rarely use it! ;) So I decided share a simple card to show that, when it comes to DSP, a little bit can go a long way and you can use it very effectively as small accents.


I chose the Flashback DSP collection as the inspiration for my birthday card, and I pulled colors from the paper for the rest of the elements. The focal image was created with the Four Feathers bundle (stamp set and Framelits). And the sentiment is from my favorite sentiment set - Four You. Easy peasy! :)


Make sure you head on over to Catherine & Cathy Create to check out the other DSP challenge cards. If you feel inspired to make your own, make sure you link it up, because you could win a prize!

Happy Stampin'! :)

Saturday, November 1, 2014

CCC#049: November Challenge - Thankful for Fall

CCC#049
November 2014 Monthly Challenge
Thankful for Fall

This month's challenge from Catherine and Cathy Create is all about autumn! Leaves, sweaters, pumpkin spice, boots, Thanksgiving... whatever inspires you about fall, we want to see it! :)

I have a crazy-simple project for you this month, but I totally love it. I gotta say (and I know I say this every month but...) this last month really got away from me! And I'm so bummed, because October is my favorite month of the entire year and I feel like I missed it! I have been so busy lately, and I know I'm not the only one, and I know it's just going to get worse with the holidays approaching so quickly. I usually feel like I have to pull out all the stops on any projects I share here on the old blog-o, like I really have to turn up the "wow factor." But today I'm proud to be sharing literally a 10-minute project, because I know it's something we can all use around this time of year! :)


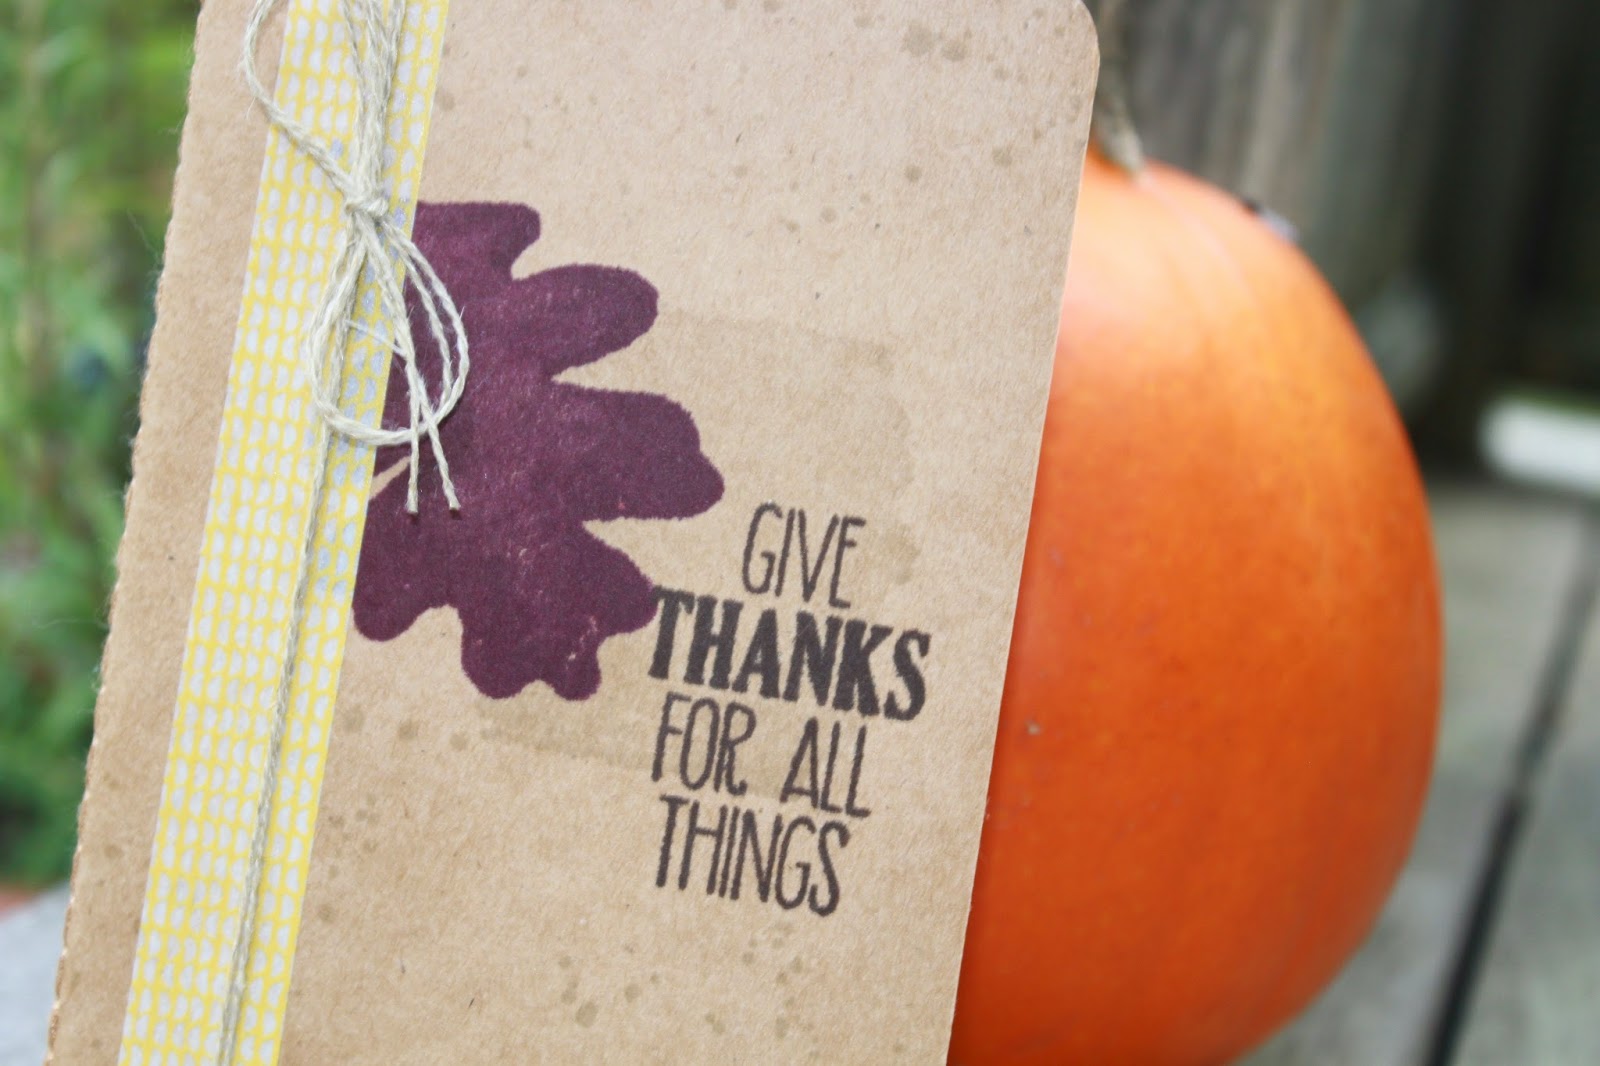
I decided to dress up one of Stampin' Up!'s great new Kraft Grid Journals. This could be a great little gratitude journal, or just a cute notebook with a great message to just throw in your purse to use for everyday lists and notes! And because I only used two stamp sets, it literally takes no time at all! :) I used one of my favorite sets from the Holiday Catalog for most of the stamping, so really, you only need one stamp set to make an adorable little journal. The set is called For All Things. I also used Gorgeous Grunge to add a little extra interest to the background.


One thing to keep in mind when stamping on these kraft journals... They seem to be more absorbent than regular cardstock. So don't press your stamps too hard, and expect that the images will lose a little of their definition. The stamp set I chose for my project - For All Things - is great for this because the images are designed to look sort of watercolor-y, but you do lose a lot of the great texture of the images.

So that's it for me for today. I hope you liked this super cute and quick project, and I encourage you to head on over to Catherine and Cathy Create to check out the other projects, and to play along!

Happy Stampin'! :)

Friday, September 19, 2014

Fall Wreath Card

Just a sweet, simple card to share with you today. :) I've shared a couple cards made with the new Fall Fest stamp set - I guess I like this set!


I'm particularly in love with the cute little leaves that are in this set. For this card, I decided to create a wreath with them. I just traced one of the Circle Framelits lightly onto my Naturals White cardstock panel. Then I just stamped the leaves around the circle. Easy! And it works great because these particular leaf images all have a slight curve to them, so they form the wreath shape beautifully. The sentiment is from Four You - I love this font!


I created a little embellishment for the wreath by layering a button (it's from a retired button collection), some linen thread, a sequin (from the Gold Sequin Trim) and a pearl. Cute!

Happy Stampin'! :)

Tuesday, September 16, 2014

Partial Diecut Pumpkins

Hands down, die cutting is one of the coolest and most convenient things in a crafter's arsenal, don't you think? And you can get such amazing effects with all sorts of different die cutting techniques! I've shared cards in the past using partial die cutting techniques, where the die cut image sort of hangs off the fold of the card. I used a similar technique on today's card, but smack dab in the center of the front panel!


You could absolutely get this effect by cutting out the window and adhering the pumpkins over the bottom of it. But by using partial die cutting, the whole thing is seamless and it's such a cool effect. Here, I can prove it...


Look where the circle meets the pumpkin on the left. It's all one piece! Love this! If you want to see how to achieve partial die cutting on your projects (it's not hard, I promise!), I would recommend Jennifer McGuire's video. It spells out the technique really well.


I used two stamp sets on this card. The pumpkins are from Fall Fest, which is a great photopolymer set in the Holiday Catalog. It's kind of a cutesy, Halloween-y set, but I chose to grow it up a little more on this sophisticated card. I used Pumpkin Pie, Tangelo Twist, and Tangerine Tango inks, and the stems were stamped in Old Olive. The sentiment is from Kinda Eclectic. I love this sentiment because it goes with the fall/gratitude theme, without being a generic "thank you." The green background from the Color Me Autumn DSP collection.

Thanks for stopping by today. Happy Stampin'! :)

Sunday, September 14, 2014

Start-to-Finish #41 - Masked Leaves Card

Remember my recent post for the September Cards Challenge from Catherine and Cathy Create? The challenge this month was masking. The card I'm sharing with you today was the first card I made for that challenge. In the end, I decided it was just a little too clean and simple, and I wanted to step it up a little bit. But I still think it's a pretty card.


I used one stamp set for this card, from the new Holiday Catalog. It's called For All Things, and it's got some great watercolor-look images and some really awesome sentiments. I also used the Color Me Autumn DSP and coordinating washi tape.


You can watch the video below, or over on my YouTube channel. Enjoy!


Happy Stampin! :)

Sunday, September 7, 2014

CCC#044: September Cards Challenge - Fun with Masks


It's time for another Cards Challenge from Catherine and Cathy Create! This month, it's all about masking. Stampin' Up! has recently released some awesome stencil-style masks that I'm totally in love with. (One set is Dots and Stripes, the other is Hearts and Stars - they're so cute!) But I decided to do some CAS masking for my card this month, using some of the new fall stamps from the Holiday Catalog.


I used Post-Its to mask off a frame around the edge of a piece of Naturals White cardstock. Then I stamped the cute little leaves from the Fall Fest stamp set. (It has matching Framelits too - and comes in a bundle at 15% off!) I used Crushed Curry, Tangelo Twist, Cherry Cobbler, and Crumb Cake inks.


I embossed a sentiment from another new set called For All Things in gold on Early Espresso cardstock. I created the little embellishment using the Fun Fall Framelits (that match the Fall Fest stamp set), one of the Autumn Wooden Embellishments, and linen thread. Hey - Did you know you can make your own metallic cardstock? All I did to make that cute little leaf gold was press my Versamark ink pad on some scrap cardstock, shake on some gold embossing powder, and heat set it. Then I just die cut the leaf out of that! Easy and adorable!

So now it's your turn! Check out Catherine and Cathy Create to see what the other DT members made. Then link up your project using masks, and you might win goodies from Stampin' Up!

Happy Stampin'! :)

Friday, September 5, 2014

Coloring with Blendabilities Alcohol Markers

I have been wanting to share a video for a while now on how I color with the new Blenabilities markers from Stampin' Up! A lot of people are freaked out by these markers, but I promise they're not scary at all!

What's so special about Blendabilites? They're alcohol-based markers that you can use to create an amazing and life-like blended look. Plus, you can use them on all sorts of surfaces - even non-porous ones like rhinestones, window sheets, buttons... They come in sets of three shades of one color - light, medium, and dark. You want to make sure you're using a water-based ink pad when you stamp an image that you want to color with Blendabilites. Memento Tuxedo Black ink works awesome, and it just happens to be my favorite black ink of all time!


I made this great little tag using one of my favorite new stamp sets from the Holiday Catalog. It's called Holiday Home and it's adorable! It also comes in a bundle with Framelits, at a 15% discount! And just because it's a "holiday" set, doesn't mean you can only use it for Christmas cards. It's got a lot of great fall and year-round images and sentiments.


Look at the great shading on this house! That's Blendabilities for ya! :) Now, there's no one right way to use these markers. My video just shows how I like to color with them, as well as some tips that I've found work for me. If you have any questions, please feel free to ask. But the best advice I can give is just to get your hands on these markers and play with them! :) Enjoy!


Happy Stampin'! :)

Saturday, August 9, 2014

One Stamp, Four Ways: Love Birds Anniversary Card

If I may say so myself, I think this idea was pretty brilliant on my part! :-D This is the last of the four cards I made, and it's definitely the most different from the other ones. I shared three very different cards, but on all of them I used a flower stamp set to stamp, well, flowers. On this card, I wanted to think outside the box and really use the stamp in a new and different way.


I think these birds came out so cute! I used the large and small leaf stamps, and they're perfect! For the beaks, I just carefully inked the tip of the stamp in So Saffron ink, then inked up the rest of the stamp in my main color (I used Pool Party and Crisp Cantaloupe... which I realize looks like pink in this photo - sorry). Then I drew in their feet with a Basic Gray marker, and adhered them down with dimensionals. Easy and cute!

I also used the amazing new Hearts and Stars Masks to sponge a few hearts at the bottom of the Smoky Slate panel. I decided to make this an anniversary card, but I think it could be super cute for a baby card, too!

I hope I've inspired you to take another look at some of your stamps and see how you can mix them up. Have fun!

Happy Stampin'! :)

Friday, August 1, 2014

CCC#040: August 2014 Challenge: #InstaLove


CCC#040
August 2014 Monthly Challenge
#InstaLove

This month's challenge from Catherine & Cathy Create is to make a project inspired by social media in some way... hashtags, Instagram, Facebook, selfies... You name it - if it's online, it's all good! :)

My first instinct for this challenge was to make some Project Life cards (which I still plan to do, by the way, so stay tuned!). But then I decided to think beyond myself a little bit. It dawned on me that this would be a perfect challenge to make a "boy" project for! So, I decided to think about what a teenage boy would like, and make a birthday card.


I love how this stamped background paper came out! But, let me tell you, it took a long time to make!  I used two different stamp sets - #hello and @SoSocial. They both have awesome "hashtag" style sentiments for a ton of different occasions. I pulled out all the birthday, boy, and generic (#awesomeness, #friendsarethebest, etc.) sentiments and stamped them randomly on the diagonal on Whisper White cardstock. I used Bermuda Bay, Tangelo Twist, and Pear Pizzazz inks. So here's why it took me so long... I can't line anything up for beans. So my Stamp-a-ma-Jig is my bff. But I decided I wanted to use all of the relevant sentiments (I think there were 10) and I wanted to stamp them randomly - not always the same sentiments in the same colors or in the same order. So I had to stamp on the Stamp-a-ma-Jig imaging sheet, then stamp on the cardstock. Every. Single. Time. If I were going to do this again, I'd suck it up, choose 3 or 4 sentiments, and keep them in the same colors so I didn't have to keep re-doing the imaging sheet! If I had enough clear blocks to keep all my stamps mounted, it probably wouldn't have taken quite as long. LOL!


The awesome, huge @ symbol (which, by the way, doesn't seem to have a name in English) is from the #hello set. I heat embossed it with Versamark ink, black embossing powder, and my heat tool on Whisper White cardstock. The sentiment is from Four You, and it's stamped on Tangelo Twist cardstock. I also added a little wood veneer banner from the Wooden Elements Embellishments for some added interest.

So that's it for me for today! Make sure you head over to Catherine & Cathy Create because the other DT members have some awesome projects to share with you, too! And if you share your social media inspired project, you might win some goodies!

#happystampinfriends! LOL :-D

Monday, July 7, 2014

CCC#038: July Cards Challenge - Green Planet


CCC#037: July 2014 Cards Challenge
Green Planet
Inspired by Earth

OK, friends, this month's challenge is to make a card inspired by planet Earth. Now I'll admit, this one really had me stumped for a while. I kept pouring over my stamp collection thinking... What direction do I want to go with this? Maps? Blue and green? When I couldn't make up my mind, and no stamps were jumping out at me, I decided this challenge called for one thing: Custom made stamps! :)


Isn't it amazing that we can carve our own stamps now?! Stampin' Up! just thinks of everything! I've done my fair share of linoleum block printing in my life, but the Undefined stamp carving kit has sat on my shelf for almost a year now (it was introduced at Convention last year, remember?) and I could never decide what I wanted to make with it. So glad I still had it there ready and waiting when I decided what to do for this project!


I decided to do my stamping on this paper from the Typeset DSP collection, because it looks like newspaper and, to me, that fits with the recycling part of the message. I kept the rest of the card very simple - a simple spiral border, linen thread, and I sponged the card base using the polka dots stencil from the new Dots and Stripes Decorative Masks.

As I was stamping these images, I was thinking about how nice they'd look just on a simple one-layer notecard. So I decided to give that a try too! But of course, I couldn't just leave it at that... :)


I ended up cutting about an inch off the bottom of the card, and then I adhered the DSP to the inside so it peeks out the bottom. And I also added some white bakers' twine.


I hope you enjoyed these cards and that you're excited to give the Undefined stamp carving kit a try! Let me tell you, this kit is amazing! Like I said, I've done linoleum blocks before with the hard linoleum and the soft flexible kind. The rubber in the Undefined kit blows them both out of the water! It cuts like buttah! I highly recommend you give it a try! :)


(P.S. These aren't the blocks that come in the kit for you to mount your stamps on - but there are 4 blocks that are included. My dad made these for me because my stamps happened to be a little too big for the small blocks and too small for the large block.)

Head on over to Cathy and Catherine Create to check out the other DT members' cards. And don't forget to link up your card if you play along with the challenge - you could win an awesome prize!

Happy Stampin'! :)


Tuesday, July 1, 2014

CCC#037: July 2014 Challenge - National Pride

CCC#037: July 2014 Monthly Challenge
National Pride

This month's challenge from Catherine and Cathy Create is to make any project inspired by your country's national colors. A lot of us are celebrating Canada Day and the 4th of July, so this is perfect timing! Though, I have to say this one wasn't much of a challenge for me since 95% of my recent projects have been red, white, and blue! :-D

So as I told you before, I've been completely addicted to the Sea Street stamp set and matching Maritime DSP collection... which just happens to be red, white, and blue! What I love about the Sea Street set is that it's so much more versatile than it may appear at first glance. Sure, there are cutesy smiling sea creatures that are probably most appropriate for projects for kids. But the other images in the set are perfect for creating a totally on-trend and very sophisticated preppy nautical look. That was what inspired my project for this challenge.


I decided to put together a complete stationery set with everything you need to send adorable notes right in one box. Since I used the preppy nautical theme, this set is very grown-up, but would also be completely appropriate for a child off to sleep-away camp. :)


I used Stampin' Up!'s white notecards and envelopes to quickly and easily create a set of 6 clean and simple notecards. I stamped the anchor and rope images from Sea Street and the hello sentiment from A Dozen Thoughts in Real Red, Coastal Cabana, and Night of Navy inks.


The notecards come come with envelopes, but I wanted to dress up the cards a little so I made my own envelopes out of the Maritime DSP and the envelope punch board. Quick, easy, and cute!


Since the DSP envelopes don't have any sealer on them, I thought it would be nice to stick some coordinating stickers into the kit. These are just some white yardsale price stickers I had hanging around, but the anchor stamp fits perfectly on them! I also found some large mailing label stickers, white I decide to cut in half and stamp to coordinate too. (The "to" stamp is from an old Christmas set, by the way.)


Here's what it looks like when the whole set is put together. So cute and so sophisticated! I stamped on the label (with a retired alpha set - sorry!) but you could just as easily hand write your recipient's name. Or you could write a whole address on the label - it's big enough - and you could actually put this through the mail! (I'd seal the envelope up with more than just the little sticker if I was going to mail it.)

I did include a coordinating pen, because I wanted the kit to have everything you'd need to write and send a note. I wanted to put a piece of DSP inside the clear barrel of the pen, but this particular pen is just too skinny, and I couldn't find the mini version of the Pentel R.S.V.P. pens that work so well for this. Oh well, the pen still matches all by itself!

So that's it for me! Hope you enjoyed this project and you've been inspired to play along with this challenge and make a project with your country's national colors? Are they the same as mine? :) If you do make a project, make sure you link it up on Catherine and Cathy Create - and while you're there, check out the other DT members' projects.

Happy Stampin'! :)