Friday, November 29, 2013

Stampin' Up! Holiday SALE


If you're like me, the thought of Black Friday shopping probably made you crawl deeper into your warm bed this morning. Stampin' Up! has your answer! Now through Monday, get up to 50% off a great selection of Stampin' Up! products. Check all your crafty friends off your list today - hassle free! Maybe you'll even find a little to-me-from-me gift that you can't resist! ;) 


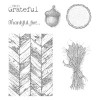
You'll find Christmas and holiday items, everyday items, even some great money-saving bundles that are exclusive to this sale! Here are a few of my fave items


Check out all the great deals over at my online store, and don't mess with the Black Friday stress! :)

Thursday, November 28, 2013

Fall Mantel Projects Post #5: Paper Foliage Wreath

Missed the first three posts? Check them out here.

Happy Thanksgiving to my American friends! I wanted to pop by today to show you the last project I made for my fall mantel… even though I'm very late and I'm sure you're all into Christmas decorating mode :)


This was the first wreath I've ever made! I have to say it was pretty daunting, but I really like how it came out. And it was super easy, too - I really tried hard not to over-think it :) I just went to town with my glue gun and a huge pile of die cut leaves. And just like in the other projects, I embossed some of the leaves using the Gorgeous Grunge stamp set and gold embossing powder. I also crumpled up the leaves before I glued them on.


I made a simple layered bow with the Crushed Curry chevron ribbon. (Don't tell, but it's totally glued together, not tied! *wink wink*)


I also die cute some leaves out of Champagne glimmer paper and some from the burlap ribbon. I cut  some Whisper White cardstock to the size of the die (6x6" I think), then layered on a same-size piece of  Big Shot Multipurpose Adhesive Sheet. Then I took strips of the burlap ribbon and butted them up next to each other until I had the whole piece covered, and I ran that through the Big Shot. Easy! 


So that's it - That's all my projects! :) And here's a view of the mantel as a whole…


I hope you enjoyed these projects! (And I'm sorry I'm so late in sharing the last couple.) Have a wonderful Thanksgiving! And Happy Hanukkah for those of you celebrating!

Happy Stampin'! :)


Fall Mantel Project Supplies


Monday, November 25, 2013

Fall Mantel Projects Post #4: Barnwood Frame

Missed the first three posts? Check them out here.

One of the keys to creating beautiful mantel displays is varying the heights of the objects you're arranging. As I was pulling my items together, I realized I needed something else that was tall. So I created this super simple project.


I got this barnwood frame from etsy - it was super cheap because it was just the frame (no glass or backing). Then I created a simple little banner from die cut leaves, burlap, buttons, and linen thread. So easy! 


I crumpled up the leaves before tying them onto the linen thread. This gives them great texture. I created the little burlap nabbers by wrapping the burlap ribbon around the twine and securing it with Sticky Strip. Seriously, this project couldn't be easier and it took me less than a half an hour! And it's super customizable for any season or occasion.


Here it is on my mantel. Check out the variation in height that it creates - Doesn't it look great? :)

Happy Stampin'! :)


Fall Mantel Projects Supplies:


Thursday, November 14, 2013

Fall Mantel Projects Post #3: Embellished Mason Jar Candle Holders

Welcome to Post #2 of my Fall decor projects series! If you missed the first two posts, you can check them out here. Today's project is super simple and very customizable to whatever supplies you have on hand. Grab some jelly jars, or old empty spaghetti sauce jars, and in minutes you can create some super cute candle holders!


This one coordinates with with the other items I made. I used the chevron stencil from the Build a Banner Kit to paint a length of Burlap Ribbon. I just used white acrylic paint that I colored with Crushed Curry reinker - same as I used on the ombre frame that I shared in my first post. Then I just grabbed a couple of the leaves I'd cut for the other projects, hot glued them to the jar, and hot glued a Very Vintage Button over the stems. P.S. See that Crushed Curry leaf with that great texture? So simple - I just folded the leaf in half and ran it through the Woodgrain embossing folder. Easy peasy! :)


This one's a little different in terms of the supplies I used, but it still coordinates beautifully with the other projects. Doily, burlap, linen thread, button, and a faux leaf from the dollar store. 


Here's one of my jars "in action" with some other items on my mantel. Remember to be very careful if you're burning candles in these embellished jars. If you have paper, twine, or ribbon on the outside, it could catch on fire when you're lighting the candle! You may want to use a battery operated tea light. Otherwise, make sure you use a small votive or something similar that is entirely contained within the jar. And be careful while you're lighting it.

Happy Stampin'! :)

Thursday, November 7, 2013

CCC#014: Cards Challenge - Button Up!


Welcome to the November Card Challenge from Catherine and Cathy Create! This month's theme for our card projects: Buttons! I tried to think of something clever to do with buttons, but in the end, I had a few elements in mind that I really wanted to use, so I ended up making this card...


I'm pretty pleased with how it came out. I used sponge daubers to create my own polka dot pattern on the card base. I did some in Soft Sky ink, then some in Versamark, which I embossed with silver embossing powder. All you have to do is ink up the dauber, and use it like a circle stamp. If you give it a very little twist and apply light pressure, you'll get more of a circle rather than a blob. :) Then I cut a piece of vellum 1 inch longer than the card. I adhered it to the back of the card, and then folded it over to the front of the card. You get a really classy overlay effect, plus you can't see the adhesive through the vellum on the front.


Here you can see a little better how the polka dots look through the vellum. Isn't that a neat effect? For the sentiment, I used the Expressions Thinlits dies to cut the word Merry from silver glimmer paper. I love these dies! They're a little fussy, but the look they make is so worth it! Hint: I love using the two-way glue pen to attach these die cuts to my projects.


For the embellishment, I created a pretty layered snowflake using the Festive Flurries stamp set and matching dies. The larger of the two snowflakes is stamped in Soft Sky, and the smaller snowflake is embossed in silver. I know this photo isn't stellar, but you can see the shimmer from that embossing powder. And you can see the button in action here too - It's one of the larger vintage faceted buttons. They're pretty much my favorite! :) It looks like crystal, or ice, and adds a really pretty finish to the snowflake.

So that's it for me today. Now go check out the other design team members' cards. And if you play along with this month's button challenge, you might win some Stampin' Up! blog candy! :)

Until next time…

Happy Stampin'! :)

Sunday, November 3, 2013

Fall Mantel Projects Post #2: Thankful Leaves Embroidery Hoop

Welcome to Post #2 of my Fall decor projects series! If you missed the first post, you don't want to miss the cute painted picture frame I made, so go check it out. Today's project didn't actually end up on my mantel but it's on an adjacent wall in my living room and it coordinates beautifully with the rest of my DIY decor.


I hate to toot my own horn, but I have to say I pretty much *squee* every time I walk past this. :) I am so in love with how this project turned out! And it was beyond easy to make. I got a super inexpensive little embroidery hoop at Michael's (I think it's 6" across). The background is a piece of Canvas Creations that I cut to fit. It's a little bit thicker than the fabric you'd normally put in an embroidery hoop, so I did adhere the canvas right to the hoop with Sticky Strip. That also helps it to stay tight and smooth in the hoop. I spritzed the canvas with Crushed Curry and Cajun Craze reinkers mixed with rubbing alcohol. (Make sure you use the 70% alcohol!) I die cut two leaves from Cajun Craze cardstock and Champagne Glimmer paper. The little patterned yellow leaf is from the Thankful Tablescape Kit. (Find links to all supplies at the bottom of this post.)


Here's a little close-up of the sentiment. I stamped this phrase from the Truly Grateful stamp set in Early Espresso ink, and wrapped some Linen Thread around the banner. And that's it! So simple and cute.


This is a pretty crummy photo, but I wanted to show you this little hoop "in action" here on the wall right next to my front door where we put our keys. It extends the autumn colors and themes a little bit further, bringing the decor together a little bit better.

Hope you had a great weekend!

Happy Stampin'! :)


Thankful Leaves Embroidery Hoop Supplies