White Christmas is, hands down, my favorite stamp set in the Holiday Catalog. You know how much I love any stamp set that is perfect for watercoloring! And this one really fits the bill. :) I've made a few cards with it, but today I wanted to share my favorite with you.
I had so much fun making this card! So much watercoloring! :) And I love making cards with tags on them. Sometimes it's just so much less pressure designing a tag, and then it can be really fun designing a simple card base to showcase your cute tag.
It's a little hard to see in the photos, but I also used an amazing new punch from the Holiday Catalog called Confetti Stars. It's a border punch that cuts out a ton of tiny stars - and bonus, you can use the stars as confetti, shaker card material, or accents on other projects! I punched it from a border of Dazzling Diamonds glimmer paper.
And here's a closer look at the watercoloring. Done simply, as always. But I really love how it looks.
So anyway, yeah. I don't really have too much to say about this card, I guess. LOL. Just wanted to share!
Happy Stampin'! :)
a little blog about fabric, paper, food, and family.
set in the charming Cape Cod town of Brewster.
perpetually covered in cat fur.
Saturday, November 29, 2014
Friday, November 7, 2014
CCC#050: November 2014 Cards Challenge - Delighted with DSP!
CCC#050: November 2014 Cards Challenge
Delighted with DSP!
The Cards Challenge for this month is a fun one: Use your favorite DSP! :) But before I share my card, I have a confession. I am a DSP hoarder! I can't resist buying it, I love flipping through the packages, I love being inspired by its color combinations... but I so rarely use it! ;) So I decided share a simple card to show that, when it comes to DSP, a little bit can go a long way and you can use it very effectively as small accents.
I chose the Flashback DSP collection as the inspiration for my birthday card, and I pulled colors from the paper for the rest of the elements. The focal image was created with the Four Feathers bundle (stamp set and Framelits). And the sentiment is from my favorite sentiment set - Four You. Easy peasy! :)
Make sure you head on over to Catherine & Cathy Create to check out the other DSP challenge cards. If you feel inspired to make your own, make sure you link it up, because you could win a prize!
Happy Stampin'! :)
Saturday, November 1, 2014
CCC#049: November Challenge - Thankful for Fall
CCC#049
November 2014 Monthly Challenge
Thankful for Fall
This month's challenge from Catherine and Cathy Create is all about autumn! Leaves, sweaters, pumpkin spice, boots, Thanksgiving... whatever inspires you about fall, we want to see it! :)
I have a crazy-simple project for you this month, but I totally love it. I gotta say (and I know I say this every month but...) this last month really got away from me! And I'm so bummed, because October is my favorite month of the entire year and I feel like I missed it! I have been so busy lately, and I know I'm not the only one, and I know it's just going to get worse with the holidays approaching so quickly. I usually feel like I have to pull out all the stops on any projects I share here on the old blog-o, like I really have to turn up the "wow factor." But today I'm proud to be sharing literally a 10-minute project, because I know it's something we can all use around this time of year! :)
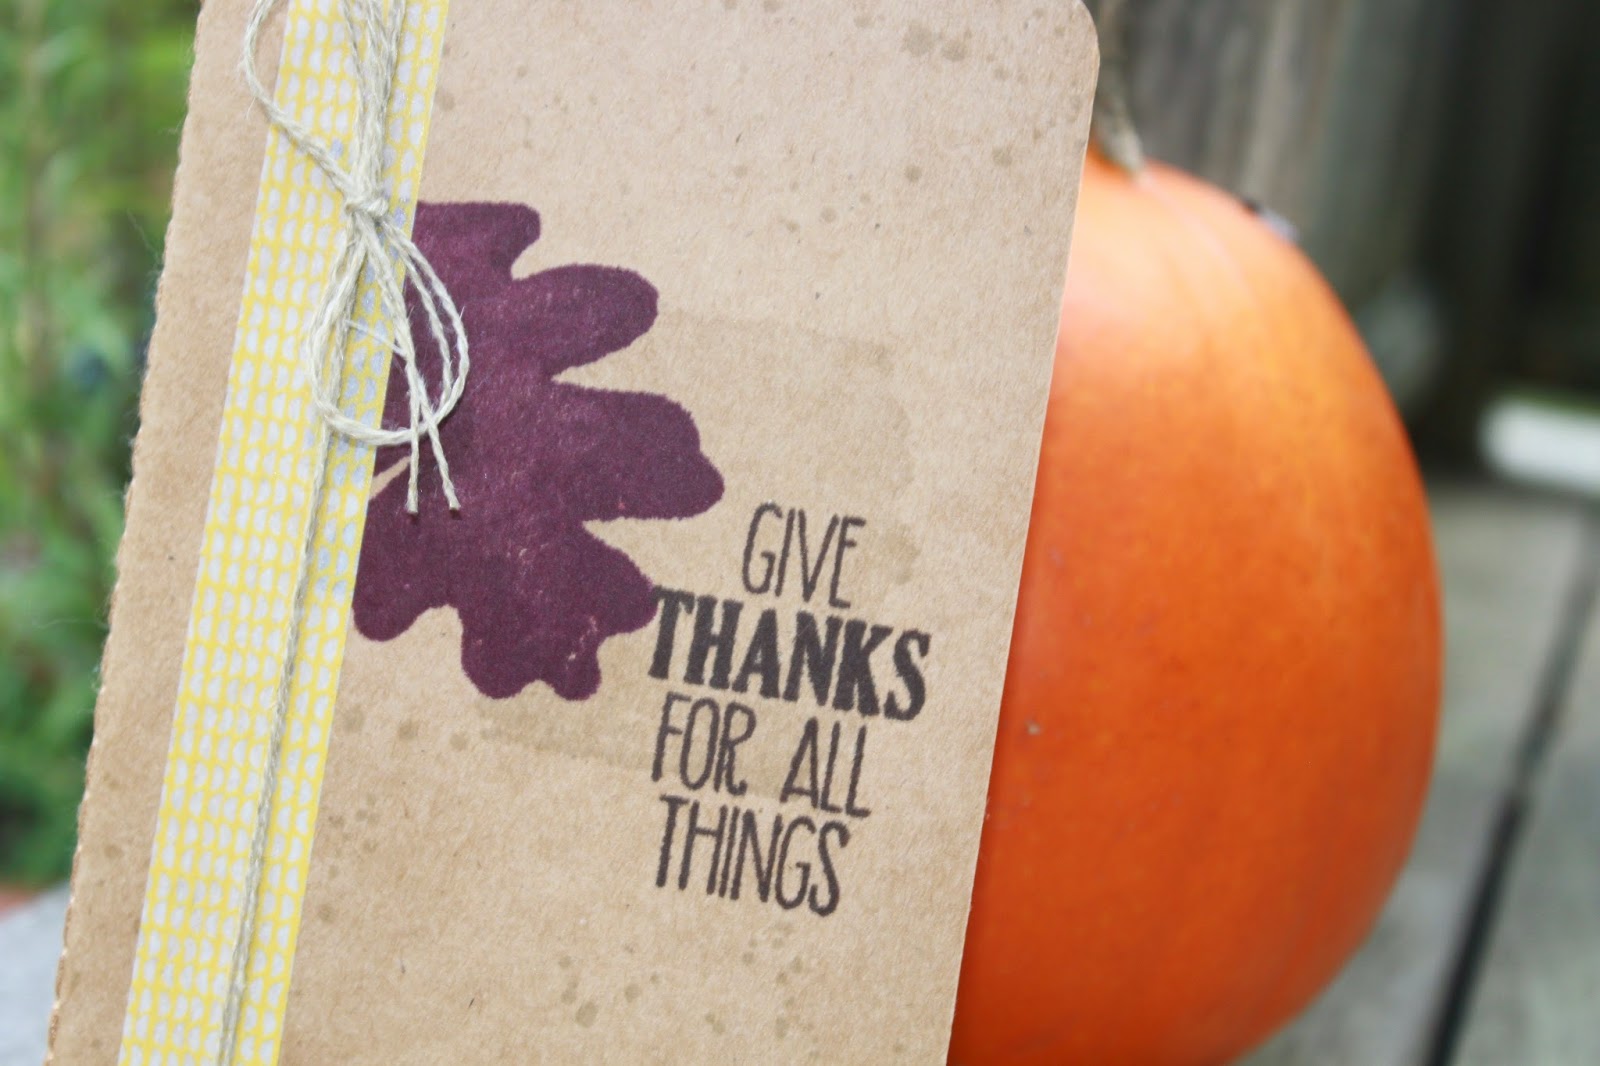
I decided to dress up one of Stampin' Up!'s great new Kraft Grid Journals. This could be a great little gratitude journal, or just a cute notebook with a great message to just throw in your purse to use for everyday lists and notes! And because I only used two stamp sets, it literally takes no time at all! :) I used one of my favorite sets from the Holiday Catalog for most of the stamping, so really, you only need one stamp set to make an adorable little journal. The set is called For All Things. I also used Gorgeous Grunge to add a little extra interest to the background.
One thing to keep in mind when stamping on these kraft journals... They seem to be more absorbent than regular cardstock. So don't press your stamps too hard, and expect that the images will lose a little of their definition. The stamp set I chose for my project - For All Things - is great for this because the images are designed to look sort of watercolor-y, but you do lose a lot of the great texture of the images.
So that's it for me for today. I hope you liked this super cute and quick project, and I encourage you to head on over to Catherine and Cathy Create to check out the other projects, and to play along!
Happy Stampin'! :)
So that's it for me for today. I hope you liked this super cute and quick project, and I encourage you to head on over to Catherine and Cathy Create to check out the other projects, and to play along!
Happy Stampin'! :)
Tuesday, October 7, 2014
CCC#047: October Cards Challenge - Halloween Color Challenge
Welcome to another Cards Challenge from Catherine and Cathy Create! This month, in celebration of October and Halloween, we've got a color challenge. (I love these!)
This photo is great because it's got a few different shades of orange, plus purple and green too. Fun! Here's my card - using my new favorite stamp set Fall Fest. :)
I brought in the purple from the photo by sponging the stars in Perfect Plum ink on the background. This is super easy with the new Decorative Masks from Stampin' Up! Love them! All the stamps are from Fall Fest - and don't forget that it comes in a bundle with the matching Framelits for 15% off! - except the sentiment, which is from Holiday Home.
Well, that's it for me today. Now head on over to Catherine and Cathy Create to see all the other great cards. If you're inspired to make your own card inspired by the color combo, make sure to link it up and you might win a prize!
Happy Stampin'! :)
Friday, September 19, 2014
Fall Wreath Card
Just a sweet, simple card to share with you today. :) I've shared a couple cards made with the new Fall Fest stamp set - I guess I like this set!
I'm particularly in love with the cute little leaves that are in this set. For this card, I decided to create a wreath with them. I just traced one of the Circle Framelits lightly onto my Naturals White cardstock panel. Then I just stamped the leaves around the circle. Easy! And it works great because these particular leaf images all have a slight curve to them, so they form the wreath shape beautifully. The sentiment is from Four You - I love this font!
I created a little embellishment for the wreath by layering a button (it's from a retired button collection), some linen thread, a sequin (from the Gold Sequin Trim) and a pearl. Cute!
Happy Stampin'! :)
I'm particularly in love with the cute little leaves that are in this set. For this card, I decided to create a wreath with them. I just traced one of the Circle Framelits lightly onto my Naturals White cardstock panel. Then I just stamped the leaves around the circle. Easy! And it works great because these particular leaf images all have a slight curve to them, so they form the wreath shape beautifully. The sentiment is from Four You - I love this font!
I created a little embellishment for the wreath by layering a button (it's from a retired button collection), some linen thread, a sequin (from the Gold Sequin Trim) and a pearl. Cute!
Happy Stampin'! :)
Tuesday, September 16, 2014
Partial Diecut Pumpkins
Hands down, die cutting is one of the coolest and most convenient things in a crafter's arsenal, don't you think? And you can get such amazing effects with all sorts of different die cutting techniques! I've shared cards in the past using partial die cutting techniques, where the die cut image sort of hangs off the fold of the card. I used a similar technique on today's card, but smack dab in the center of the front panel!
You could absolutely get this effect by cutting out the window and adhering the pumpkins over the bottom of it. But by using partial die cutting, the whole thing is seamless and it's such a cool effect. Here, I can prove it...
Look where the circle meets the pumpkin on the left. It's all one piece! Love this! If you want to see how to achieve partial die cutting on your projects (it's not hard, I promise!), I would recommend Jennifer McGuire's video. It spells out the technique really well.
I used two stamp sets on this card. The pumpkins are from Fall Fest, which is a great photopolymer set in the Holiday Catalog. It's kind of a cutesy, Halloween-y set, but I chose to grow it up a little more on this sophisticated card. I used Pumpkin Pie, Tangelo Twist, and Tangerine Tango inks, and the stems were stamped in Old Olive. The sentiment is from Kinda Eclectic. I love this sentiment because it goes with the fall/gratitude theme, without being a generic "thank you." The green background from the Color Me Autumn DSP collection.
Thanks for stopping by today. Happy Stampin'! :)
You could absolutely get this effect by cutting out the window and adhering the pumpkins over the bottom of it. But by using partial die cutting, the whole thing is seamless and it's such a cool effect. Here, I can prove it...
Look where the circle meets the pumpkin on the left. It's all one piece! Love this! If you want to see how to achieve partial die cutting on your projects (it's not hard, I promise!), I would recommend Jennifer McGuire's video. It spells out the technique really well.
I used two stamp sets on this card. The pumpkins are from Fall Fest, which is a great photopolymer set in the Holiday Catalog. It's kind of a cutesy, Halloween-y set, but I chose to grow it up a little more on this sophisticated card. I used Pumpkin Pie, Tangelo Twist, and Tangerine Tango inks, and the stems were stamped in Old Olive. The sentiment is from Kinda Eclectic. I love this sentiment because it goes with the fall/gratitude theme, without being a generic "thank you." The green background from the Color Me Autumn DSP collection.
Thanks for stopping by today. Happy Stampin'! :)
Sunday, September 14, 2014
Start-to-Finish #41 - Masked Leaves Card
Remember my recent post for the September Cards Challenge from Catherine and Cathy Create? The challenge this month was masking. The card I'm sharing with you today was the first card I made for that challenge. In the end, I decided it was just a little too clean and simple, and I wanted to step it up a little bit. But I still think it's a pretty card.
I used one stamp set for this card, from the new Holiday Catalog. It's called For All Things, and it's got some great watercolor-look images and some really awesome sentiments. I also used the Color Me Autumn DSP and coordinating washi tape.
You can watch the video below, or over on my YouTube channel. Enjoy!
Happy Stampin! :)
I used one stamp set for this card, from the new Holiday Catalog. It's called For All Things, and it's got some great watercolor-look images and some really awesome sentiments. I also used the Color Me Autumn DSP and coordinating washi tape.
You can watch the video below, or over on my YouTube channel. Enjoy!
Happy Stampin! :)
Friday, September 12, 2014
First Christmas Card
It's actually been a few weeks since I made this card, but here it is... My first Christmas card of 2014!
This was such a fun card to make! It took maybe a little more time than some cards, but I think the results are well worth it. :) I used the brand new and totally amazing Tree Punch to create both the Pistachio Pudding trees and the 3-dimensional trees. For the Pistachio Pudding trees, I punched the tree out of some scrap paper (just printer paper, nothing fancy), and used it as a stencil to sponge on the ink. I also stamped the Dictionary background stamp in Pistachio Pudding before lifting the "stencil" and moving on to the next tree.
These cool 3-dimensional trees were created by punching a mess of trees from a piece of Typeset DSP - I think each tree has 6 punches. (I don't quite remember, sorry.) Then I just folded them all in half, covered one half generously in snail adhesive, and glued them together back-to-back. A little time consuming, but ultimately pretty easy.
I also used a new stamp set from the Holiday Catalog that I totally love. It coordinates with the Tree Punch - it's called Festival of Trees. I stamped the cute little baubles on the trees, and embossed them with silver embossing powder. The sentiment is also from the same stamp set, and I embossed that in silver too.
So there you have it! My first Christmas card of the year! Hope you liked it. Have you started on your Christmas cards yet?
Happy Stampin'! :)
This was such a fun card to make! It took maybe a little more time than some cards, but I think the results are well worth it. :) I used the brand new and totally amazing Tree Punch to create both the Pistachio Pudding trees and the 3-dimensional trees. For the Pistachio Pudding trees, I punched the tree out of some scrap paper (just printer paper, nothing fancy), and used it as a stencil to sponge on the ink. I also stamped the Dictionary background stamp in Pistachio Pudding before lifting the "stencil" and moving on to the next tree.
These cool 3-dimensional trees were created by punching a mess of trees from a piece of Typeset DSP - I think each tree has 6 punches. (I don't quite remember, sorry.) Then I just folded them all in half, covered one half generously in snail adhesive, and glued them together back-to-back. A little time consuming, but ultimately pretty easy.
I also used a new stamp set from the Holiday Catalog that I totally love. It coordinates with the Tree Punch - it's called Festival of Trees. I stamped the cute little baubles on the trees, and embossed them with silver embossing powder. The sentiment is also from the same stamp set, and I embossed that in silver too.
So there you have it! My first Christmas card of the year! Hope you liked it. Have you started on your Christmas cards yet?
Happy Stampin'! :)
Sunday, September 7, 2014
CCC#044: September Cards Challenge - Fun with Masks
It's time for another Cards Challenge from Catherine and Cathy Create! This month, it's all about masking. Stampin' Up! has recently released some awesome stencil-style masks that I'm totally in love with. (One set is Dots and Stripes, the other is Hearts and Stars - they're so cute!) But I decided to do some CAS masking for my card this month, using some of the new fall stamps from the Holiday Catalog.
I used Post-Its to mask off a frame around the edge of a piece of Naturals White cardstock. Then I stamped the cute little leaves from the Fall Fest stamp set. (It has matching Framelits too - and comes in a bundle at 15% off!) I used Crushed Curry, Tangelo Twist, Cherry Cobbler, and Crumb Cake inks.
I embossed a sentiment from another new set called For All Things in gold on Early Espresso cardstock. I created the little embellishment using the Fun Fall Framelits (that match the Fall Fest stamp set), one of the Autumn Wooden Embellishments, and linen thread. Hey - Did you know you can make your own metallic cardstock? All I did to make that cute little leaf gold was press my Versamark ink pad on some scrap cardstock, shake on some gold embossing powder, and heat set it. Then I just die cut the leaf out of that! Easy and adorable!
So now it's your turn! Check out Catherine and Cathy Create to see what the other DT members made. Then link up your project using masks, and you might win goodies from Stampin' Up!
Happy Stampin'! :)
Friday, September 5, 2014
Coloring with Blendabilities Alcohol Markers
I have been wanting to share a video for a while now on how I color with the new Blenabilities markers from Stampin' Up! A lot of people are freaked out by these markers, but I promise they're not scary at all!
What's so special about Blendabilites? They're alcohol-based markers that you can use to create an amazing and life-like blended look. Plus, you can use them on all sorts of surfaces - even non-porous ones like rhinestones, window sheets, buttons... They come in sets of three shades of one color - light, medium, and dark. You want to make sure you're using a water-based ink pad when you stamp an image that you want to color with Blendabilites. Memento Tuxedo Black ink works awesome, and it just happens to be my favorite black ink of all time!
I made this great little tag using one of my favorite new stamp sets from the Holiday Catalog. It's called Holiday Home and it's adorable! It also comes in a bundle with Framelits, at a 15% discount! And just because it's a "holiday" set, doesn't mean you can only use it for Christmas cards. It's got a lot of great fall and year-round images and sentiments.
Look at the great shading on this house! That's Blendabilities for ya! :) Now, there's no one right way to use these markers. My video just shows how I like to color with them, as well as some tips that I've found work for me. If you have any questions, please feel free to ask. But the best advice I can give is just to get your hands on these markers and play with them! :) Enjoy!
Happy Stampin'! :)
What's so special about Blendabilites? They're alcohol-based markers that you can use to create an amazing and life-like blended look. Plus, you can use them on all sorts of surfaces - even non-porous ones like rhinestones, window sheets, buttons... They come in sets of three shades of one color - light, medium, and dark. You want to make sure you're using a water-based ink pad when you stamp an image that you want to color with Blendabilites. Memento Tuxedo Black ink works awesome, and it just happens to be my favorite black ink of all time!
I made this great little tag using one of my favorite new stamp sets from the Holiday Catalog. It's called Holiday Home and it's adorable! It also comes in a bundle with Framelits, at a 15% discount! And just because it's a "holiday" set, doesn't mean you can only use it for Christmas cards. It's got a lot of great fall and year-round images and sentiments.
Look at the great shading on this house! That's Blendabilities for ya! :) Now, there's no one right way to use these markers. My video just shows how I like to color with them, as well as some tips that I've found work for me. If you have any questions, please feel free to ask. But the best advice I can give is just to get your hands on these markers and play with them! :) Enjoy!
Happy Stampin'! :)
Subscribe to:
Posts (Atom)