Friday, November 1, 2013

CCC#013: November Challenge - Triangles

I've said it before, and I'll say it again, but I can't even handle how fast this year is going by! It's November!! Somebody said recently that Christmas is something like 8 weeks away! What??!? But anyway… That's enough of my monthly diatribe. :) Singe it's the first of the month, that means another challenge from Catherine and Cathy Create!


This month's challenge: TRIANGLES!

This was a tough one for me. Triangles are very trendy right now, but they're not a trend I've really embraced. So I struggled a little bit. But in the end, I like the card I came up with.


Now, my ever-so-thoughtful husband was "kind" enough to point out that chevrons are technically not triangles. But I argue that they are triangular. So I'm counting it. :-P I used the Chevron Border Punch from the Holiday Catalog and layered some DSP behind it.


Have you looked ahead to the rest of this month's calendar? Hanukkah is wicked early this year - it actually starts the night before Thanksgiving! So I decided to make more of a non-denominational holiday season card. The Winter Frost DSP is perfect! Two of the sheets have a beautiful silver metallic finish - I used one of them on the present from the Color Me Christmas stamp set. You can see the shine in the photo above. I paper pieced the image using the Winter Frost DSP and Bermuda Bay cardstock.


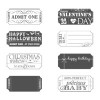
I embossed the sentiment with silver embossing powder on Bermuda Bay cardstock. It's from the newest photopolymer set, called Endless Wishes. Unfortunately, I just learned after I made this card that this set has sold out for now. But keep an eye for it to come back - it's an amazing winter/holiday set! I love the mix of script and type, and the sentiments can be combined into so many great greetings.

I appreciate you stopping by my blog today. Make sure you visit Catherine and Cathy Create to check out what the other DT members have made. And if you link up your own challenge project, you could win some great Stampin' Up! goodies! :)

Happy Stampin'! :)

Tuesday, October 29, 2013

Candy Corn Inspired Dip-Dye Banner

I was really inspired by an amazing dip-dye banner that one of the Stampin' Up! concept artists shared on the SU! blog a while back. I decided to make a similar one for Halloween inspired by candy corn.


Came out pretty cute, huh? :) And it was super easy! I used the Build a Banner Kit. I had to cut the triangle shapes because I wanted them to look like candy corn and the banners in the kit are shaped differently. But it was really easy to change the shapes - just two straight cuts. Then I used Crushed Curry and Pumpkin Pie ink refills mixed with water to dye the banners. A tip if you want to try this at home: Contrary to what I would have thought, keeping the canvas in the colored water longer didn't really deepen the color. So add enough reinker to get the color you're looking for on the first dip.


Then when the ink was dry, I used the letter stencils in the kit with Basic Black ink and a sponge dauber to spell out the word BOO. Easy peasy! The kit does come with some awesome twine to string your banner, but I have another project I'm using that for. So I just used some wide black satin ribbon that I had kicking around (I think it came from the Hallmark Store).

Happy Halloween! :)

Friday, October 25, 2013

25% OFF STAMP SETS!


Quick announcement about a majorly amazing deal from Stampin' Up! Through October 28th ONLY -  that's this Monday - you can get 25% off 25 favorite stamp sets!  WHOA! :) This is valid on both the wood mount and clear mount versions of all 25 sets. Visit my website to check them all out - you can place an order online or contact me to order.


Here are a few of my favorites that are featured in this awesome promotion.


Tuesday, October 22, 2013

Fall Mantel Projects Post #1: Ombre Paint Stirrer Frame

Every year around this time, I find myself once again whining about my lack of fall, Halloween, and Thanksgiving decorations. This year, I decided to quit whining and do something about it! I don't usually do a lot of home decor crafting - frankly I find it intimidating. So this was a challenge, but it turned out to be a really fun and satisfying challenge. I used a core set of supplies on all the projects (see list at the bottom of this post) to make putting them together really fool proof. Plus, it makes all the items coordinate beautifully! I'm going to share them with you one by one, and then I'll share the whole mantel with you, since it's still a work in progress. :)


So here's my first project to share with you! How cute is this little frame? :) I cut paint stirrer sticks, painted them in ombre shades of Crushed Curry, and hot glued them onto a cheap 4x6 picture frame. Did you know you can color white acrylic paint with Stampin' Up! ink refills? It's so easy! I did learn a few things while making this project though... First of all, you probably want to prime your paint sticks. They seem to soak up a lot of the paint. (The colors have actually lightened up even since I took this picture - but the frame is still super cute!) Second of all, it takes more reinker than you would probably think to get a really saturated color. So start with a small amount of paint. And remember that the reinkers are only $2.95, so you can totally afford to get a couple extra for special projects. I just painted one row of pieces, added some more reinker to the paint, painted the next row, and so on. 


I also added a cute little burlap flower that I made using Burlap Ribbon ruffled onto one of the Jumbo Sticky Rounds. (Stay tuned, I think I might make a video tutorial for this.) Then I added the two leaves and a button tied with twine to make this frame coordinate with the other projects. Super cute!

Below you'll find a list of the common Stampin Up! products I used on all of my fall mantel projects. Be sure to come back soon to check out my next project. :)


Monday, October 21, 2013

one martini, two martini, three martini...

... Floor! Ha ha! ;)

Anyway... today is the birthday of one of my oldest and dearest friends. Well, actually, she's really one of my youngest friends - LOL!  She and I are the same age for 5 whole days every year. :) But again, I digress... (Geez. I'm in some kinda funny mood today, huh?) She's a fan of martinis and other cocktails - there's always a very impressive bar at her parties that I never know what do to with! For a while now I've been wanting to make cocktail onions, so my hubby and I finally got around to doing that, and I decided to put together a little martini-themed birthday present. Homemade cocktail onions, not homemade vermouth-soaked olives, and a gift card to a local liquor store. So obviously I had to make a matching tag, right? :)


You all know how I have come to feel about tags lately, especially where cute and coordinated, but quick gift wrapping is concerned! Tags are totally a crafty gal's best friend :)


I broke out the Happy Hour set for this one. Love this set! I decided to keep things simple and let the stamping really shine.


I used Basic Gray and Smoky Slate markers to stamp the martinis, and Crumb Cake, Old Olive, and Real Red markers on the olives. Then I stamped the two sentiments in Basic Gray, adding in a pop of yellow with the Daffodil Delight banner. I really like the mix of the primary colors here, especially with the royal blue bag.


This little touch I can't take credit for. I saw it somewhere recently - don't remmeber if it was from a fellow demonstrator or one of the Stampin' Up! concept artists. Either way, I think it's totally brilliant! This is the large ticket from the Ticket Duo Punch. Doesn't it just create the cutest little tag topper? Awesome. :)

Thanks for stopping by today. Have a great Monday.

Happy Stampin'! :)

Sunday, October 20, 2013

Halloween Lollipop Treat

Good Sunday morning, my friends! Unfortunately I don't have a Start-to-Finish Sunday for you today. BUT I do have a little Halloween project video that I put together for you! :)


This cute little lollipop wrapper was inspired by the one on page 108 of the 2013-2014 Stampin' Up! Catalog. You've heard me say before that "cheap and cheerful" is kinda my crafting MO, right? Well this project totally fits the bill! :)


This would be a great for a classroom Halloween party, or if you're expecting a few special Trick-or-Treaters. Or just change out the DSP and you can make this same project for pretty much any party, celebration, or holiday! I chose to use the Oh, Goodie stamp set from the Holiday Catalog for the sentiment. This is a great set for this project because you could use any one of the four sentiments, depending on the theme of the occasion. And they're all perfectly sized to fit this project too!

You can watch the video below, or over on my YouTube channelNote that I made this project sized to fit a Tootsie Pop or Blow Pop. You can certainly change the measurements to fit a different type of lollipop.If you have any questions, feel free to contact me.


Thanks for stopping by. I hope you enjoy the rest of your weekend!

Happy Stampin'! :)

Monday, October 7, 2013

CCC#011: Cards Challenge - In Threes


It's the 7th of the month - You know what that means! Another Cards Challenge over at Catherine and Cathy Create! :)

I have to be honest here and tell you that this month's challenge completely slipped my mind! I had it on my calendar, my weekend to-do list... I even had my card all designed out in my head! And I didn't remember any of it until I was in the shower today at 7am! :(

Anyway... This month the cards challenge is "In Threes." That is to say that any element on the card repeats three times. This was a real challenge for me! I decided to use the awesome new Envelope Punch Board to make a gift card size card and envelope set. And to add a little pizzazz I decided to make the envelope with vellum. Check it out... :)


OK, OK, so I bet some of you have already caught me... I used the feather stamp *four* times. So sue me :-P I only used it three times on the card. The envelope just needed another repetition of the feather! LOL.


So here's the card alone. Seriously, I cannot stop using the Sweater Weather DSP! It was totally the inspiration for the color palette I used on this project. I LOVE these colors, and I love that they don't have to be just for fall-themed cards.


Here's a better look at the envelope, and you can really see the vellum in action. I used Tombow Mono Multi Glue to secure the envelope together. I didn't love how the bottom flap looked, so I used the strips of DSP and cardstock to hide it. Vellum envelopes are just so classy, don't you think? :)

So now, even though I'm a little late in posting this, make sure you head over to Catherine and Cathy Create to see what the other DT members made. And if you play along too, you might win some Stampin' Up! goodies! So get on over there, get inspired, and link up your project!

Until next time... Happy Stampin'! :)


Three Feathers Card and Envelope Supplies