Who's ready for Christmas?? :-D I'm *thisclose* to having everything ready… but I'm hosting this year so I still have a lot of cooking to do. But in the midst of all the hustle and bustle, I wanted to pop in and share two last-minute card ideas.
This one's super simple and you can pretty much make it with any supplies you have. Living on Cape Cod, I make a lot of beach themed things. But you can, of course, use any stamps you like in any color scheme you like. But the idea is super simple - stamp a repetitive pattern on a cardstock panel, add a little ribbon and a little DSP and you're good! I chose to tear the bottom of the DSP just to add a little interest. Also, in subsequent versions of this card, I used the 2-Way Glue Pen to add a little Dazzling Diamonds glitter to the centers of the sand dollars. Easy peasy! :)
This one shows a sneak peek at one of my favorite new Framelits collections from the upcoming Occasions Catalog. See that Polaroid-style frame? A while back, I showed you how to make something similar with the Squares Framelits, but this frame is one die and it has some awesome embossing details on it. Love. And I also love the other dies in the set… they're perfect for all you scrapbookers!
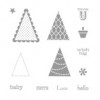
For this card, I stamped the tree three times without re-inking. You get this great variation of color with only one ink, plus a really nice dimensional effect. And of course I had to add some glitter "snow" to the trees - What's Christmas without some bling?? :) It's hard to see in the photo, but it's really pretty in real life!
Thanks for stopping by today. I hope you and all your family and friends have a beautiful and merry Christmas, and I wish you all the best in the coming year! Enjoy your holiday and…
Happy Stampin'! :)
a little blog about fabric, paper, food, and family.
set in the charming Cape Cod town of Brewster.
perpetually covered in cat fur.
Monday, December 23, 2013
Sunday, December 15, 2013
Quick Hostess Gift Enclosures
Hey there! Happy 10 Days Until Christmas! :) Are you ready? Well I've got a quick and simple last-minute card project idea for you today.
My social calendar has been busier than ever before in my life this month - I've never had so many Christmas parties and events! And with party season upon us, sometimes what you're looking for is a holiday themed card or tag that doesn't actually say Merry Christmas. So I decided to create a super simple 3x3 Christmasy thank you card.
These would be great to put with a hostess gift. Perfect if you're traveling and staying at someone's house and want to leave a little gift behind. Or to put with a teacher or neighbor gift.
I took my cues from the Season of Style DSP stack - $6.95 for 48 double-sided sheets! It's so perfect for projects like this. The color palette is a total no-brainer, and it's super cute… Old Olive, Cherry Cobbler, Baked Brown Sugar, Crumb Cake, and Whisper White.
I love the combo of Whisper White ink on Crumb Cake, and it goes so well with this color scheme. The snowflake stamp is from Festive Flurries, and the thank you sentiment is from Regarding Dahlias. It's stamped in Early Espresso.
So I hope this project gives you some ideas for your last-minute holiday crafting needs. Have a great week!
Happy Stampin'! :)
Snowflake Thank You 3x3 Supplies
Labels:
2013 Holiday Catalog,
3x3,
cards,
CAS,
Christmas,
Stampin' Up,
stamping,
tag
Monday, December 9, 2013
Mixed Metallic Christmas Card
I'm definitely not a rebel - not in terms of fashion, the food I try, or the activities I'm drawn to. But I have always loved mixed metallics, which, once upon a time, were a big faux pas! Thankfully, the rest of the world has come around to my way of thinking (lol) and mixed metallics are super trendy :) And what better theme for a simple and very elegant Christmas card?
This is actually the Christmas card I made to send to my downline. And I love how it came out. I pulled out all the metallic stuff I could find… Gold Embossing Powder, Silver Embossing Powder, Champagne Glimmer Paper, and Silver Glimmer Paper. So then I had Christmas and metallic, and the obvious choice was… of course! Stars! I just randomly stamped the stars from Simply Stars randomly all over a Very Vanilla panel. The easiest way to get multi-colored heat embossed images? Stamp a bunch in Versamark, then sprinkle on one color of embossing powder. Tap of the excess really well. Then stamp a bunch more, sprinkle on the next color, tap the excess really well. Want more different colors? Well… you get the drill. Then you can heat emboss all at once - No risk of burning previously embossed images when you go back in to emboss a second color!
Here you can see the great shine on this card. Love it! I chose to pair all these metallics with Crumb Cake and Linen Thread because the combo of metallics and rustic is one of my favorites.
(P.S. The sentiment on this set is from a photopolymer set that sold out faster than Stampin' Up! had expected and is sadly no longer available. But, the small star punch I used, which is from the 2012 Holiday Catalog - is on sale!)
Thanks for stopping by today. Have a great week!
Happy Stampin'! :)
Mixed Metallic Christmas Card Supplies
Saturday, December 7, 2013
CCC#017 - Oh Christmas Tree
Hello! Welcome to another Cards Challenge from Catherine and Cathy Create! This month's theme is…
Oh, Christmas Tree
For my card this month, I needed a simple and easy to mass-produce card. I'm having a card making party at my house next weekend - Cocktails and Christmas Cards! Does that sound like fun or what? :) Anyway, most of the ladies who are coming are complete stamping newbies. So I wanted to design a card that is super cute, but had as few elements and techniques as possible. This card would be perfect for making a ton to send to everyone on your Christmas card list!
Hint: I cut the top of the tag into a perfectly rounded shape by tracing one of the Ovals Collection Framelits and cutting it with my Paper Snips. But… let me just say that there's a new product in the upcoming Occasions Catalog that will let you make adorable tags in any size with just one *punch*! :)
Now make sure you check out the other DT members' cards on Catherine and Cathy Create! They are awesome! And if you link up your own Christmas tree card, you might win some Stampin' Up! goodies! Thanks for stopping by today. Have a great weekend :)
Happy Stampin'! :)
Christmas Tree Card Supplies
Sunday, December 1, 2013
CCC#016: 'Tis the Season
CCC#016: December 2013 Challenge
'Tis the Season
For this month's challenge from Catherine and Cathy Create, anything goes - as long as it's Christmas! :) I wanted to share a super simple gift packaging option. I am obsessed with the Tag a Box bundle! I mean, how cute are these little kraft boxes?! They measure 6-7/8" x 2-1/8" x 2-1/2" and come with a plastic sleeve that slides over the box. Adorable and effortless - perfect for the holidays! You can get the boxes separately (8 of them for $6.95!), or you can get the bundle with the boxes and the Accessories Kit and save. The accessories kit includes a ton of tags that are perfect for layering, plus baker's twine, dimensionals, and adorable mini clothespins. I used the bundle on this project.
You could leave the box as-is and let your cute gift show through the clear sleeve - some homemade cookies maybe? :) Or you can create a little cardstock topper like I did here. I used Cherry Cobbler cardstock and stamped the snowflakes in Cherry Cobbler ink. The cardstock is cut to 6-7/8" x 4-3/8" and it's scored at 1" and 3-3/8" on the short side. Just place it over the box and slide the clear sleeve over the whole thing. SO easy!
I created a belly band with the Season of Style DPS stack, then used one of the tags from the accessories kit. I tied Cherry Cobbler baker's twine around the box, and clipped the tag on with one of the mini clothespins. Ca-ute! :)
Please visit Catherine and Cathy Create to see what the other design team members have made. You will love their Christmas inspiration! And if you play along with the challenge, and link up your project, you might win some Stampin' Up! goodies!
Thanks for stopping by. Happy Stampin'! :)
Joyful Tidings Box Supplies
Subscribe to:
Comments (Atom)


