Showing posts with label birthday. Show all posts

Friday, November 7, 2014

CCC#050: November 2014 Cards Challenge - Delighted with DSP!

CCC#050: November 2014 Cards Challenge
Delighted with DSP!

The Cards Challenge for this month is a fun one: Use your favorite DSP! :) But before I share my card, I have a confession. I am a DSP hoarder! I can't resist buying it, I love flipping through the packages, I love being inspired by its color combinations... but I so rarely use it! ;) So I decided share a simple card to show that, when it comes to DSP, a little bit can go a long way and you can use it very effectively as small accents.


I chose the Flashback DSP collection as the inspiration for my birthday card, and I pulled colors from the paper for the rest of the elements. The focal image was created with the Four Feathers bundle (stamp set and Framelits). And the sentiment is from my favorite sentiment set - Four You. Easy peasy! :)


Make sure you head on over to Catherine & Cathy Create to check out the other DSP challenge cards. If you feel inspired to make your own, make sure you link it up, because you could win a prize!

Happy Stampin'! :)

Thursday, August 7, 2014

CCC#041: August Card Challenge - Happy Birthday!


August 2014 Challenge
Happy Birthday, CCC! :-D

I can't believe it! Catherine & Cathy Create is celebrating it's First Birthday! I have been so honored to be part of the Design Team, and I've had such fun with the challenges. I hope you have too! So, of course, this month's card challenge is all about birthday cards. I rode with the first birthday theme too, and chose to make a birthday card that would be great for your favorite kiddo!


I love this little Kind Koala stamp! It's a single wood-mount stamp. So cute! I modified the image a little for this card. The koala is holding a flower, and there's a sentiment around him, but I didn't want to use those portions of the image. I stamped the koala on watercolor paper and colored him using Smoky Slate, Basic Gray, and Blushing Bride inks and a water brush


I also used Pistachio Pudding, Tangelo Twist, and Crushed Curry inks with the Gorgeous Grunge stamp set to create the look of confetti. This koala sure knows how to party!


Instead of the flower, I decided to make some fun birthday banners for the koala to hold. I used a piece of Confetti Celebration DSP, and a cute sentiment from Something to Say

That's it for me for this challenge. But make sure you head on over to Catherine & Cathy Create to see the other Design Team members' cards. Link up your own birthday card and you might win a prize!

Happy Stampin'! :)

Friday, August 1, 2014

CCC#040: August 2014 Challenge: #InstaLove


CCC#040
August 2014 Monthly Challenge
#InstaLove

This month's challenge from Catherine & Cathy Create is to make a project inspired by social media in some way... hashtags, Instagram, Facebook, selfies... You name it - if it's online, it's all good! :)

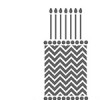
My first instinct for this challenge was to make some Project Life cards (which I still plan to do, by the way, so stay tuned!). But then I decided to think beyond myself a little bit. It dawned on me that this would be a perfect challenge to make a "boy" project for! So, I decided to think about what a teenage boy would like, and make a birthday card.


I 
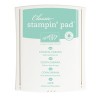
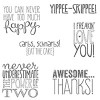
love how this stamped background paper came out! But, let me tell you, it took a long time to make!  I used two different stamp sets - #hello and @SoSocial. They both have awesome "hashtag" style sentiments for a ton of different occasions. I pulled out all the birthday, boy, and generic (#awesomeness, #friendsarethebest, etc.) sentiments and stamped them randomly on the diagonal on Whisper White cardstock. I used
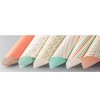
 Bermuda Bay, Tangelo Twist, and Pear Pizzazz inks. So here's why it took me so long... I can't line anything up for beans. So my Stamp-a-ma-Jig is my bff. But I decided I wanted to use all of the relevant sentiments (I think there were 10) and I wanted to stamp them randomly - not always the same sentiments in the same colors or in the same order. So I had to stamp on the Stamp-a-ma-Jig imaging sheet, then stamp on the cardstock. Every. Single. Time. If I were going to do this again, I'd suck it up, choose 3 or 4 sentiments, and keep them in the same colors so I didn't have to keep re-doing the imaging sheet! If I had enough clear blocks to keep all my stamps mounted, it probably wouldn't have taken quite as long. LOL!
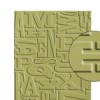

The awesome, huge @ symbol (which, by the way, doesn't seem to have a name in English) is from the #hello set. I heat embossed it with Versamark ink, black embossing powder, and my heat tool on Whisper White cardstock. The sentiment is from Four You, and it's stamped on Tangelo Twist cardstock. I also added a little wood veneer banner from the Wooden Elements Embellishments for some added interest.

So that's it for me for today! Make sure you head over to Catherine & Cathy Create because the other DT members have some awesome projects to share with you, too! And if you share your social media inspired project, you might win some goodies!

#happystampinfriends! LOL :-D

Sunday, July 27, 2014

Start-to-Finish Sunday #40 - Stamped Muslin Bag

Here's a project I made for my sister-in-law's birthday a few weeks back. I had found this adorable personalized wine bottle coozie online months ago, and I wanted to put a little something with it - besides a bottle of wine, of course! :) And I wanted to make some custom packaging to match perfectly.


Cute, right? The colors don't match perfectly, but it still coordinates great! I love these Mini Muslin Bags that Stampin' Up! sells now. They're so cute and so versatile. And they're made of a great fabric that's perfect for stamping on. Want some tips? Check out my video below, or over on my YouTube channel.


Happy Stampin'! :)

Thursday, June 26, 2014

One Stamp, Four Ways: Bright Birthday Card

I'm back today with card 2 of 4 using the Flower Patch stamp set! If you missed the first card in my challenge to make 4 different cards with one stamp set, make sure you check it out here: http://bit.ly/1rvqc1Z So you've seen me make a sympathy card with this set... The next card I needed was a birthday card for a friend.


This particular friend is a very bubbly and vivacious gal, so I chose a bright color palette of Strawberry Slush, Pear Pizzazz, Bermuda Bay, Crushed Curry, and Tangerine Tango. I stamped the flowers randomly on a Whisper White panel, starting with the largest flower (in Strawberry Slush) first, and working my way down to the smallest (in Bermuda Bay). I love stamping my own backgrounds like this - I can make a stunning card in no time at all!

This card is similar to my first card in that there's a lot of stamping, and very minimal embellishment. I added some Dazzling Diamonds to the centers of the Strawberry Slush flowers, but otherwise let the graphic black and white sentiment serve as an embellishment. I love this sentiment, which is also from the Flower Patch set. And it's absolutely perfect for this birthday girl! :) I embossed it on Basic Black cardstock with white embossing powder.


I also decided to mimic some of the stamping on a panel inside the card for a little extra color and flair. Super simple!

Well, we're halfway through my little challenge here. I've got two more cards up my sleeve, and one of them is really different! :) So stay tuned!

Happy Stampin'! :)

Saturday, April 26, 2014

Retirement Party Part Three - And a Technique Video!


This is a technique I learned a while back from a fellow demonstrator Jackie Hart. It's called the "filter paper technique" - I've also seem a similar technique that's been called the "tissue paper technique." I like this better, though, because it uses the Creped Filter Paper from Stampin' Up! which holds up a lot better than tissue paper.


The amazing texture that results from this technique is hard to capture in a photo, but trust me, you will love it! It's like you stamped on beautiful artisan handmade paper! And it's so easy! Check out my how-to video below, or over on my YouTube channel.


Note that I used a few retiring products on this card that - as of when I'm writing this post! - are still available... but only while supplies last! I used the En Français background stamp (which I just finally bought myself and now it's retiring!), the Scallop Trim Border Punch, and Raspberry Ripple ink (the cardstock is no longer available).

Happy Stampin'! :)

Tuesday, January 7, 2014

CCC#020: Cards Challenge - Birthday Bonanza!


January 2014 Cards Challenge: Birthday Bonanza!

Now that Christmas is over, it's time to replenish our stocks of year-round cards :) Hence this month's card challenge: Birthday cards. I decided to use the new Retro Fresh DSP collection again and make a sort-of masculine, sort-of kid card. So… for a young boy maybe? LOL :) Let's just say it's not overtly feminine. 


Super super simple! One DSP collection, two stamp sets. A little bit of fussy cutting (stars) and some clear heat embossing (Tangerine Tango banner), but otherwise this card came together really easily. 

Now get on over to Catherine and Cathy Create to check out the other DT Members' cards! Go get inspired, then create your own birthday card. Link it up to the challenge post and you might win a new stamp set! What are you waiting for!? :)

Happy Stampin'! :)


Make a Wish Card Supplies


Monday, October 21, 2013

one martini, two martini, three martini...

... Floor! Ha ha! ;)

Anyway... today is the birthday of one of my oldest and dearest friends. Well, actually, she's really one of my youngest friends - LOL!  She and I are the same age for 5 whole days every year. :) But again, I digress... (Geez. I'm in some kinda funny mood today, huh?) She's a fan of martinis and other cocktails - there's always a very impressive bar at her parties that I never know what do to with! For a while now I've been wanting to make cocktail onions, so my hubby and I finally got around to doing that, and I decided to put together a little martini-themed birthday present. Homemade cocktail onions, not homemade vermouth-soaked olives, and a gift card to a local liquor store. So obviously I had to make a matching tag, right? :)


You all know how I have come to feel about tags lately, especially where cute and coordinated, but quick gift wrapping is concerned! Tags are totally a crafty gal's best friend :)


I broke out the Happy Hour set for this one. Love this set! I decided to keep things simple and let the stamping really shine.


I used Basic Gray and Smoky Slate markers to stamp the martinis, and Crumb Cake, Old Olive, and Real Red markers on the olives. Then I stamped the two sentiments in Basic Gray, adding in a pop of yellow with the Daffodil Delight banner. I really like the mix of the primary colors here, especially with the royal blue bag.


This little touch I can't take credit for. I saw it somewhere recently - don't remmeber if it was from a fellow demonstrator or one of the Stampin' Up! concept artists. Either way, I think it's totally brilliant! This is the large ticket from the Ticket Duo Punch. Doesn't it just create the cutest little tag topper? Awesome. :)

Thanks for stopping by today. Have a great Monday.

Happy Stampin'! :)

Monday, August 19, 2013

Confetti Birthday Tag


Yeah, yeah, another tag. Are you sick of them yet? :) This is one I made for a co-workers 60th birthday surprise party. Confetti is another really big trend these days - and it seems to just be getting bigger! I tried playing with the confetti look for one of my Convention swap cards, but I love the idea of working actually 3D confetti into my projects.

This tag came together way easier than I thought it would. I just cut the same tag shape out of Whisper White cardstock and Window Sheet. I sandwiched a handful of little punched circles in between them, and sewed around the edge.


The flower embellishment is made with a bunch of pieces punched with the Pansy Punch layered together, secured with a brad in the center, and scrunched up. Check out the great dimension - I love it!


The sentiment is from the set Four You - it's pretty much my favorite greeting set right now! And just look at how cute the tag looks on just a simple brown paper lunch sack! Easy peasy! :)


Happy Stampin'! :)

Saturday, August 17, 2013

Beach Babe Birthday Tag

My sister-in-law's birthday was back in July, but I just haven't gotten around to sharing the tag I made for her present with you yet! Jill lives at the beach in the summertime. (I'm jealous. I wish I had the time to go to the beach!) So I picked out some amazing all-natural sunscreen, yummy-smelling bathing suit wash, and a cute tank from an awesome local screenprinting business. And, of course, I had to make the wrapping match the theme of the present! :)


Cute, huh?! I used Canvas Creations from Stampin' Up! - it's this amazing 12x12 canvas that's perfect for stamping and all sorts of other techniques. For this tag, I used Pool Party reinker to dip dye a tag shape cut from the canvas. (Dip dye and ombre looks are super trendy right now!)


Then I stamped a few of the shells from By the Seashore in Pacific Point, Pool Party, and Crumb Cake, cut them out, and adhered a linen thread bow behind them. The birthday sentiment is from a new stamp set called Four You.


OK, I'll admit, this tag was a little time consuming, but all of the techniques I used were super easy. And I love how it turned out! And once the tag was made, the rest of the packaging couldn't have been simpler. Just a solid colored bag from Hallmark, and some white tissue! That's what I love about a homemade tag!

Thanks for stopping by today.

Happy Stampin'! :)

Sunday, July 28, 2013

Embossing Folder Love!

Hey there! So... no Start-to-Finish Sunday video today. (Sorry!) Why, you ask? Well, because I'm kicking off my annual Christmas in July week a day early! Today is my Intro post over on Catherine and Cathy Create, and I decided to share one of my favorite things: Textured Impressions Embossing Folders from Stampin' Up! And I wanted to create a bonus card featuring an embossing folder and some of the new Holiday Catalog goodies that you'll be able to shop for on August 1st! So check it out...


I used one of my favorite embossing folder techniques on this card. It's so easy and just takes a few extra seconds. You just ink the folder itself either with a brayer, or by swiping the ink pad directly across the folder, carefully place your cardstock inside, and run it through your Big Shot just like normal. (Check out my video tutorial on this technique.) For this card I used the Beautifully Baroque embossing folder.


Here's a close-up of the results of this technique. Isn't that pretty? And it's even more stunning in person. I love it with this tone-on-tone effect (this is Baked Brown Sugar cardstock and ink), or you can mix and match colors for a totally different look.

And here's where that sneak peek comes in! :) Three things here that you'll be able to shop for on August 1st - that's this Thursday! You can see here two stamp sets, Wonderful Wreath (#132748 wood only) and Christmas Messages (#131790 wood/#131793 clear), and one of the DSP collections, Season of Style. So pretty!


And this is the card I shared on Catherine and Cathy Create. I just love how a little bit of embossing can instantly elevate a simple card! If you've already been over to Catherine and Cathy Create, you may be here because I promised a supply list for this card. So, without further ado, here it is! Thanks for stopping by, and I hope you'll be back tomorrow through Friday for 5 wonderful Christmas in July projects! :)


Eat the Cake Birthday Card Supplies