Showing posts with label Start-to-Finish Sunday. Show all posts

Sunday, June 21, 2015

Start-to-Finish Sunday #42 - Watercolor Wings

Wait a minute. I know what you're thinking. Start-to-Finish Sunday?? Doesn't that mean a video??? Yes! My first STFS video since September! Baby Lyla actually let me get a ton of crafting the other day - including THREE videos! So stay tuned. :)

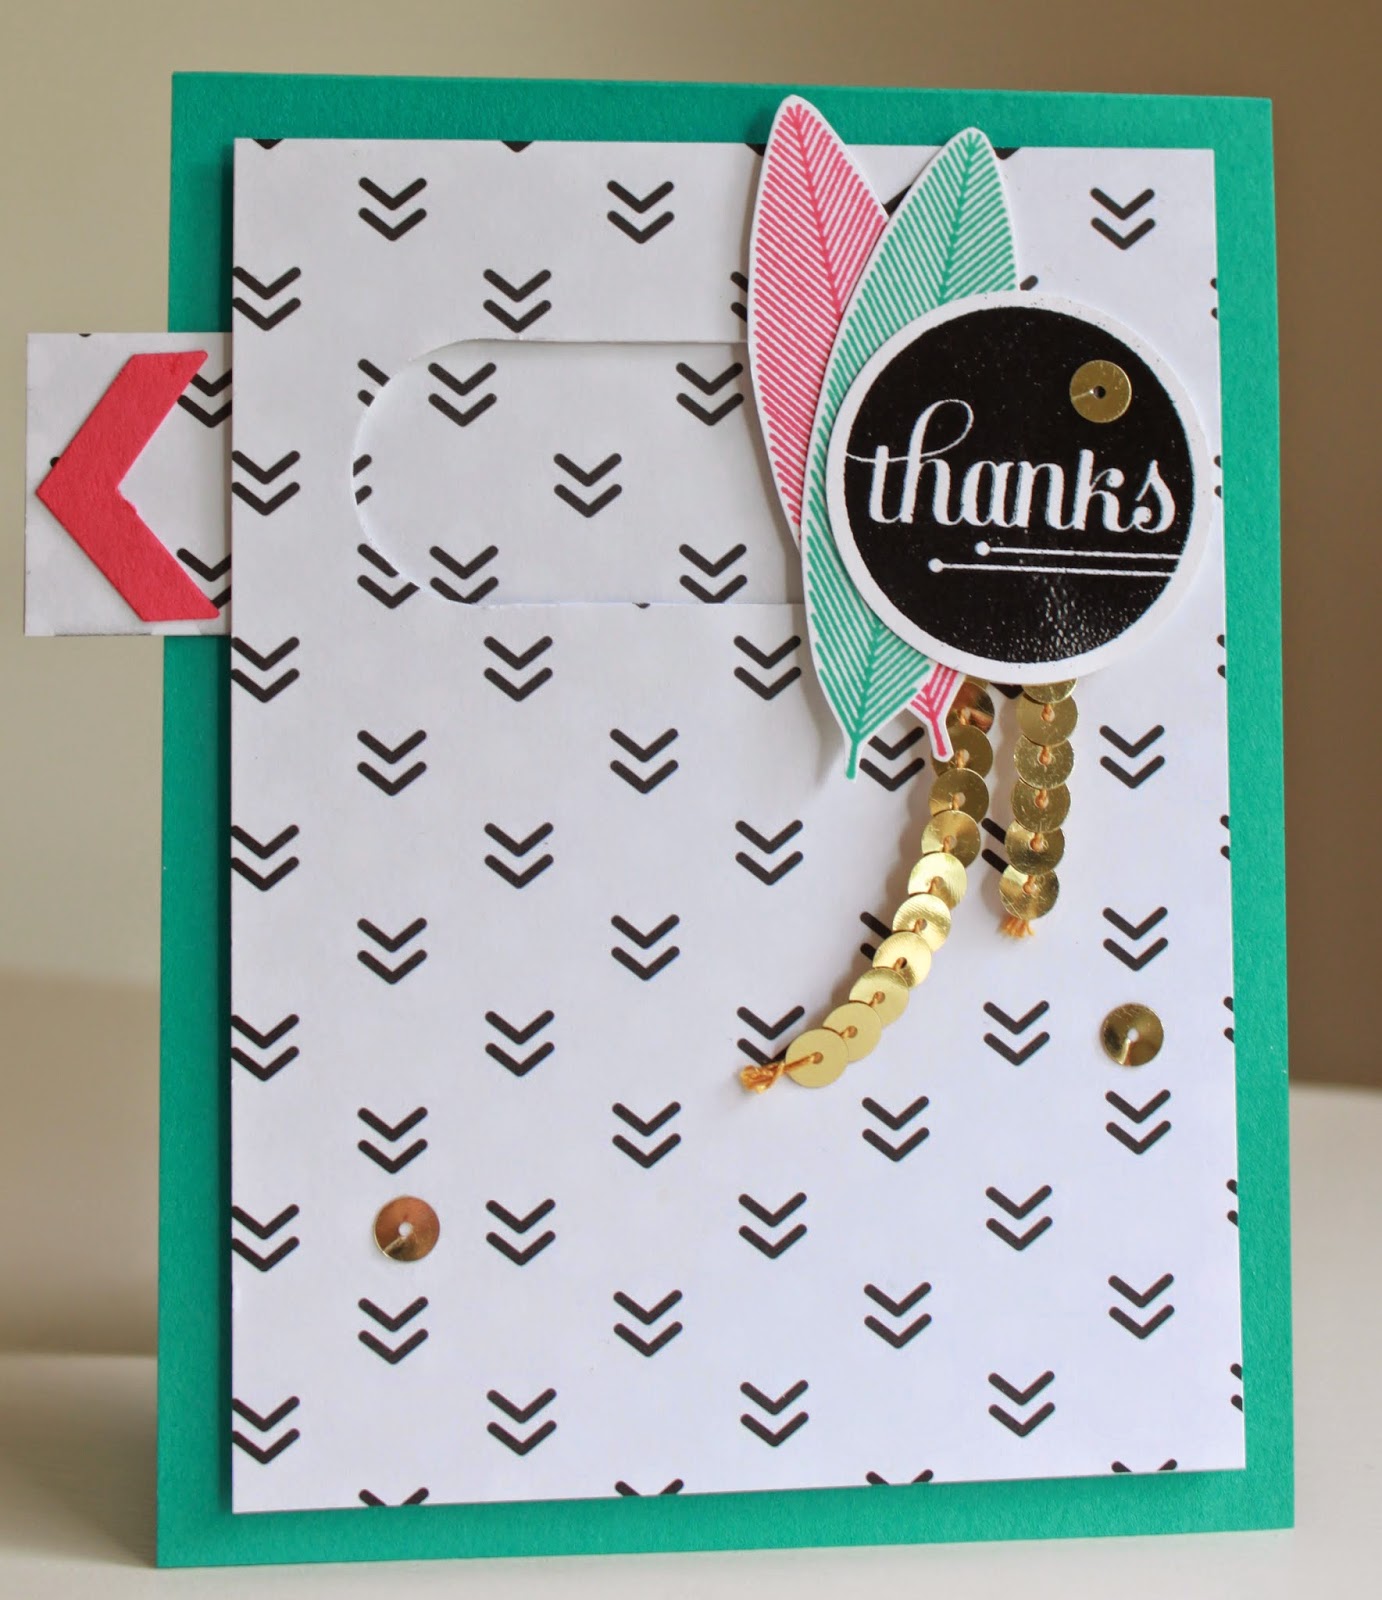
Today's card features one of the new sets from the 2015 Stampin' Up! catalog. It's called Watercolor Wings. Now, I'm not a big butterfly person, even though they're always really popular. But you guys know how much I like watercoloring, and anything that creates a watercolor look. This set fits that bill. It's made up of multiple images that you layer together to create really stunning butterflies. I love it for a tone-on-tone look with layered shades of the same color, but I'm also really excited to play with this set and try all sorts of color combinations. Which is where this card comes in!


This card was inspired by one that Alison Barclay shared on her blog. I immediately fell in love with this very unique color combination. I never would have thought to put Blushing Bride and Watermelon Wonder with Night of Navy - let alone combining them in one image. But I love it! (I also added a little bit of Smoky Slate.) The sentiment is from a stamp set called Hello Life.


In the video, I show you how to assemble the different stamps in this set to create these beautiful layered watercolor-look butterflies. You can check it out below, or over on my YouTube channel. Enjoy!


Happy Stampin'! :)

Sunday, September 14, 2014

Start-to-Finish #41 - Masked Leaves Card

Remember my recent post for the September Cards Challenge from Catherine and Cathy Create? The challenge this month was masking. The card I'm sharing with you today was the first card I made for that challenge. In the end, I decided it was just a little too clean and simple, and I wanted to step it up a little bit. But I still think it's a pretty card.


I used one stamp set for this card, from the new Holiday Catalog. It's called For All Things, and it's got some great watercolor-look images and some really awesome sentiments. I also used the Color Me Autumn DSP and coordinating washi tape.


You can watch the video below, or over on my YouTube channel. Enjoy!


Happy Stampin! :)

Sunday, July 27, 2014

Start-to-Finish Sunday #40 - Stamped Muslin Bag

Here's a project I made for my sister-in-law's birthday a few weeks back. I had found this adorable personalized wine bottle coozie online months ago, and I wanted to put a little something with it - besides a bottle of wine, of course! :) And I wanted to make some custom packaging to match perfectly.


Cute, right? The colors don't match perfectly, but it still coordinates great! I love these Mini Muslin Bags that Stampin' Up! sells now. They're so cute and so versatile. And they're made of a great fabric that's perfect for stamping on. Want some tips? Check out my video below, or over on my YouTube channel.


Happy Stampin'! :)

Sunday, July 20, 2014

Start-to-Finish Sunday #39 - Tab Slider Card

Boy, do I have a fun card to share with you today! I made this card a while back, and immediately decided it just needed a video to go along with it. I finally got around to filming it today and I'm so excited to share! So, here it is...


OK, I know, doesn't look like much, right? But hold on! See that little tab with the arrow on it? That's the interactive part. Check out what happens when you pull that tab.


Aah! I love it! :) The little octopus moves aside to reveal a hidden extra sentiment. Adorbs. And it's so easy to make! I promise!

For this card I used my current favorites again... The Sea Street stamp set and Maritime DSP. The sentiments are from Something To Say, which has some really awesome two-part sentiments.

So check out the video to see how to make this great slider mechanism on your cards! You can watch it below, or on my YouTube channel.


Here's a sneak peek of the card I make in the video. It's a little more grown-up and sophisticated, but just as fun! (This one uses A Happy Hooray for the embellishment and the Back to Black DSP. And hey! - Don't forget that select DSP is Buy 3 Get 1 FREE until the end of July!)


One thing to note: because of the tab, these cards will not fit in a standard A2 sized envelope. But don't forget - you can make an envelope that coordinates beautifully with your card project in practically any size using the Envelope Punch Board. This thing is a workhorse! And one of my favorite products that Stampin' Up! offers.

Please let me know if you have any questions about these cards. I hope you have fun making your own slider cards!

Happy Stampin'! :)

Sunday, May 18, 2014

Start-to-Finish Sunday #38: Project Life by Stampin' Up!

I know it's taken me a few weeks, but I promised you a video on how I do my Project Life layouts. So today, here it is! :) It was a little different for me... I think I was a little self-conscious of what I was doing since I was filming the whole time, plus this was the first layout I did with the Stampin' Up! Project Life supplies. They're very similar to the supplies I've used in the past, but I'm just not familiar with them yet, and the page protector layouts are a little different from what I'm used to. So when you start the video, be aware that before I started filming, I'd already tried out my photos for the week in a few of the different page layouts, and I picked the one I thought worked best.

Another thing that tripped me up a little was the sheer number of cards I had to choose from! Now, I know, this is a totally amazing thing. But it was hard to choose! So bear with me as I'm flipping through multiple times. :) The Becky Higgins Project Life Core kits that I've been using for the past year have tons of cards, but they also have way more duplicates. It seems that the Stampin' Up! kit only has two duplicates (if any) - a horizontal and a vertical orientation of the design.

So anyway, that's enough blah blah blah! Here's the finished layout that I make in the video.


I really wanted to keep it very simple - minimal embellishment, minimal stamping - to show you just how amazing your layouts can look with pretty much only the adorable cards and your awesome photos. (Note: ALL the photos on this layout were taken with my iPhone 5, and not always under stellar conditions. Check out my blog post on cell phone photo resources for Project Life here: http://bit.ly/RNaKSa


You can watch the start-to-finish video below, or over on my YouTube channel. Enjoy, and feel free to leave a comment or email me if you have any questions!


Here are the products you'll see used in this video:

Everyday Adventure Project Life Card Collection #135298 $15.95

Everyday Adventure Project Life Accessory Pack #135301 $9.95

Variety Pack 12x12 Photo Pocket Pages #135294 $6.95

Project Life Journaling Pens (set of 2) #135304 $4.95

Remember This & That Rotary Stamp #130133 $5.95

And just as a little bonus for those of you who scrolled all the way down to the bottom of this post (lol!), here is the next week's layout, which is on the back of the video layout.


Happy Scrapbookin'! :)

Sunday, March 23, 2014

Start-to-Finish Sunday #37: An *Almost* One-Layer Card

I was faced with a bit of a self-imposed challenge recently. I was prepping for the first week of a 6-week cardmaking class. I only knew one of the girls who'd signed up, and I knew she was more of a scrapbooker and I wasn't sure how much stamping experience she had. And the others? I knew nothing about them! So I decided week 1 would be Stampin' 101... no Big Shot, minimal embellishments, mostly just stamps, ink, and cardstock. And it was hard! This card was the last one I designed, and it's really kind of my favorite of the three.


It's thisclose to being a one-layer card, with just a couple very simple embellishments. One stamp set. Two ink colors. One punch. Twine. And done! :)

You can check out the video below, or over on my YouTube channel. Enjoy!


Have a great week! Thanks for stopping by!

Happy Stampin'! :)


Supply List:

Sunday, March 16, 2014

Start-to-Finish Sunday #36 - Starburst Sayings Thank You Card

I'm back with a video! Can you believe it?! :) A day on the sofa with a stuffy nose gave me the perfect opportunity to learn the newest version of iMovie and get this video edited. Believe me, I wish I could breathe, but I'm glad I'm finally getting a video posted!


This is a card I made for a recent class. Pretty simple, using just one stamp set and a background stamp. The color palette was directly inspired by the I Am Me DSP that I used.


I also took advantage of some of the awesome embellishments in the Occasions Catalog. Let me tell you... Stampin' Up! has really stepped up their embellishments! They are so cute and perfectly on-trend. I used the gold sequins, gold baker's twine, and a super cute wood veneer heart. LOVE! :)

Check out the video below, or over on my YouTube channel. Enjoy!


Thanks for stopping by. Have a good week!

Happy Stampin'! :)


Starburst Sayings Thank You Card Supplies


Sunday, September 29, 2013

Start-to-Finish Sunday #35 - Envelope Punch Board and 3x3 Card

Happy Sunday evening my friend! Videos are back - Can't believe I've been absent from YouTube for SO long! Our schedules here are slowing way down, so I hope to get back into sharing videos regularly.

For today, I wanted to share a brand new product from Stampin' Up! This was something they introduced at Convention and it is so awesome!!! It's called the Envelope Punch Board, and you can use it to effortlessly make custom envelopes in no time flat. And you can make 66 different sizes of envelopes with this thing! WOW!


So I decided to start small - literally :) - and make a 3x3 card with a coordinating envelope. I obviously had to use the Magnificent Maple stamp and Sweater Weather DSP - seems I'm a little, um... well, obsessed with this combo!


Stay tuned in the next couple days for some more projects featuring this stamp/DSP combo. I need to force myself to use something else soon! ;)

You can watch the video below, or over on my YouTube channel. If you have any questions, please feel free to contact me. (Remember: you won't find the Envelope Punch Board in any current SU! catalogs. You can find it here: http://bit.ly/1bkHNWj) Oh, and ignore that it says STFS #34 in the video - I didn't catch the mistake until I'd already uploaded it.)


I've also got a great mini-series of Fall/Thanksgiving home decor projects coming up soon... I've got a lot in the works and plan to post one project at a time as I go. I don't want to toot my own horn, but these are some of my favorite projects I've made in a long time! :)

Thanks for stopping by today. I hope you have a great week. Happy Stampin'! :)


Supplies used in today's project: