Showing posts with label Christmas in July. Show all posts

Sunday, August 4, 2013

Christmas in July Week - Day Seven: Poinsettia Polaroid Card


Sadly I don't have a Start-to-Finish Sunday video for you again this week. :( Sorry! I knew I wanted to make this card, and I did film it, but once I started editing the video I realized that this was not a great card to share start-to-finish! It would have been SO long! I got bored just editing the video, so I knew you all wouldn't like it. But don't worry, I did make you a shorter video about this card: A tutorial on how to make the Polaroid-style frame using the Square Collection Framelits. :)

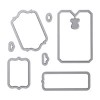
These frames that look like Polaroids or like vintage slides (Like for a slide projector. Anybody remember those? lol.) are so trendy right now! They're great for scrapbooking or for photo cards like family Christmas cards, or birth or engagement announcements. But I love the idea of using them in an out-of-the-box way, like I did on this card to frame and give dimension to the focal image! Anyway, you can check out the video below, or over on my YouTube channel.


I used the Joyful Christmas (#131802 wood/#131805 clear) stamp set again for this card - I love that poinsettia image! - and another new set from the Annual Catalog, the Dictionary (#130348 wood/#130351 clear) background stamp. I'm so excited Stampin' Up! gave us this stamp since they retired the First Edition DSP that I was so obsessed with. I sure do love a good text print! :-D The colors are Smoky Slate, Pool Party, Strawberry Slush, and Wild Wasabi. Not traditional Christmas colors, but they're bright and fresh.

So, thanks for stopping by today. I hope you had a great weekend!

Happy Stampin'! :)

Saturday, August 3, 2013

Christmas in July Week - Day Six: Snowflake Envelope Gift Bag

Day Six? Huh? Yup, you read that right! :) Originally I had planned for Christmas in July Week to go Monday through Friday, with 5 projects in total. But then I decided to kick start things early last Sunday. And I was already planning on a bonus project for this week's Start-to-Finish Sunday video, so then I figured I might as well fill in the empty day with another project! So instead of 5, you get 8 Christmas projects in total. :)

Since I've mostly done cards so far, I wanted to share another gift wrap idea. There were a lot of things I wanted to combine into this project. The final project, I think, might be a little over-the-top, but I still like it.


This is one of my favorite DIY packaging techniques - making a gift bag out of an envelope. Yes! It's so easy and comes out so cute every time! (See my video tutorial on YouTube for instructions.) I used two of my current favorite colors, Pistachio Pudding and Pool Party. Such a pretty combo that can go from summer right to winter! I also added pops of silver with the new Silver Metallic Encore Ink (#132142) from the Holiday Catalog. (It's also available in Gold, #132141.)


I made the tag with the Festive Flurry stamp set (#131778 wood/#131781 clear) and matching Framelits (#132193). Head's up - Savings Alert! These stamps and Framelits also come together in a bundle at a 15% savings! (#133284 wood/#133285 clear) To see how I made the dimensional layered tag check out this video from Stampin' Up!


I also used a new die from the Holiday Catalog - this is definitely in my Top 3 Faves in the whole catalog! It's the Gift Bow Bigz Die (#129977) and it makes two sizes of these amazing paper bows. This is the smaller one. I'll do a video soon showing how to put them together, but it's really quite easy. This style of bow has been everywhere lately, and this die makes it so easy to create the perfect one. Just check out the dimension on this beauty!


WOW! I'm pretty sure one of these is going to be on everything I give this Christmas. :) Love, LOVE this die!

So, stop on back tomorrow for my Christmas in July (...ehrm, August. Yeah, whatever - LOL!) edition of Start-to-Finish Sunday. I'm planning to demonstrate another fun die cutting technique. Until then...

Happy Stampin'! :)

Friday, August 2, 2013

Christmas in July Week - Day Five: Rustic Snowman Card

Hello and Happy Friday! :) Welcome to the 5th day of Christmas in July/August. Did you check out the Stampin' Up! Holiday Catalog yesterday? It's so awesome!

I just got a box of more new Holiday goodies on Wednesday and I couldn't wait to play. The first thing I grabbed? The adorable Snow Day stamp set (#131892 wood/#131895 clear). Is this little snowman not the cutest?! And he comes with all sorts of accessories too - it's like building your own real snowman, you're only limited by your imagination. :)


I love White Craft Ink on Crumb Cake! It's such a soft look and perfect for a rustic look. Just make sure you give it time to dry before you stamp all the other images on the snowman! (You can always hit it with your heat tool if you're impatient.)


I used the Cherry Cobbler-Old Olive-Crumb Cake combo again, and more of the Season of Style DSP (# 132340). These tones of colors also go great with the rustic look. Oh, and the banner was way easier than it looks too. I just stamped it (the sentiment is already curved), cut it out by hand leaving a "tail" on either end of the sentiment, and bent the tails backward and forward to create the banner ends. The center portion is on Dimensionals, and the ends of the banner are adhered directly to the Cherry Cobbler piece. I used the Window Frames Framelits collection to cut the window.

Hope you have some stampy plans this weekend! Are you getting inspired for your own Christmas projects?

Happy Stampin'! :)

Thursday, August 1, 2013

Christmas in July Week - Day 4: Winter Frost Hot Cocoa Pocket

This is my second post of the day today. If you've come from Catherine and Cathy Create, click here to see my card for the August challenge, Here Comes the Bride. 

Well, today is the day! The 2013 Holiday Catalog from Stampin' Up! is live and shop-able! :) If you haven't seen it yet, be sure to check out the online edition, or contact me to request a hard copy. The catalog is set up a little differently this year, with all the sample projects in the first half of the catalog, and all the products in the second half. I really like it, though, especially because all the samples are totally amazing!


Today's project is one of my favorites of the week. I love dressing up simple little treats - and what's more simple than a packet of instant hot cocoa mix? :) But creating a handmade pouch to give it in turns it into a thoughtful gift, or a great addition to a larger gift basket. This is another project that's great for classmates, co-workers, teachers, room parents, stocking stuffers... the list goes on! It comes together quickly and can be embellished as simply or elaborately as you want. You can get two packets out of one sheet of DSP, so it's also quite economical. 


I used the new Frosted Finishes Embellishments (#132150) to add a special touch to this simple pouch. They're so sparkly and pretty, and look great with this pretty combo of aquas and gray. Seriously - look at how gorgeous these things are!


Rather than try to explain in writing how to score and cut the DSP to create the pocket, I decided to make a video. You can watch it below, or over on my YouTube channel.

Remember, if you like what you've seen so far this week, check out the Holiday Catalog and start thinking ahead to your own Christmas crafting for this year. It's not to early - start now and you can be done well before the holiday stress kicks in! Visit my website, or shoot me an email to place your order any time. And don't forget, I've still got one more Christmas in July project up my sleeve for tomorrow - even though it's now August! :) Until tomorrow...

Happy Stampin'! :)


Holiday Catalog Supplies used in this project:
Winter Frost DSP #132341
Christmas Messages stamp set #131790 wood/#131793 clear
Frosted Finishes Embellishments #132150

Wednesday, July 31, 2013

Christmas in July Week - Day Three: Season of Style 3x3 Card Set

Lately, kind of out of nowhere, I've been really into making tags. Maybe because I've needed to wrap a lot of presents lately, and I'm finding that the easiest way to make cute, crafty packages is to attach a handmade tag to a simple box with a big bow. :-D

A 3x3 card is a very close cousin of the tag. I love making them because they're quick, easy, and fun to put together. And I love using them because they effortlessly dress up the simplest package!


For today's project, I decided to make a small set of 3x3 cards. These came together SO easily! When I'm making a set like this, I like to gather my supplies and just spread them all out on my desk. Then I can just grab items almost at random and put them together. It's so simple and when you pre-coordinate your supplies, everything is guaranteed to look great together! I pulled all my label type Framelits and punches and matched them with the sentiments that I wanted to use.

I took my color scheme from the Season of Style DSP collection (#132340): Old Olive, Cherry Cobbler, Baked Brown Sugar, Crumb Cake, and Whisper White. I also added in some Champagne Glimmer Paper - apparently I just can't get enough of this stuff with the Cherry Cobbler-Old Olive combo! :) The sentiments are all from the Christmas Messages stamp set (#131790 wood/#131793 clear). This set has some awesome sentiments - They can totally stand alone, but they're also matched in pairs - the "inside and outside" sentiments that are so popular lately. Check it out...


Isn't that fun? Here's some close-up images of the other cards, with their coordinating "inside" sentiments.


For the last card I also used some of the Season of Style Washi Tape (#132155). I'm so happy that Stampin' Up! is continuing to make washi tape. And this set not only coordinates beautifully with the Season of Style DSP, but it matches all the awesome scrapbooking items in the Holiday Catalog. Yes! You read that right - scrapbooking! Those of you who were disappointed to see that there were no albums, page protectors, etc. in the new Annual Catalog will be thrilled to see what the Holiday Catalog has to offer. But more on that later... :)

Thanks for stopping by today. And remember, tomorrow is release day for the Holiday Catalog! Get your pencil ready to make your wish list!

Happy Stampin'! :)

Tuesday, July 30, 2013

Christmas in July Week - Day Two: Watercolor Poinsettia Card

Hey there! Welcome to Day Two! Are you in the Christmas spirit yet? :) Today's card is pretty unique, if I may say so myself. The basic idea of this card was inspired by a presentation that Krista Frattin did at Convention. She created a simple photo card that she tucked inside one of the Chevron Bags from the Tag a Bag Kit that she had decorated. Check out my interpretation of that concept...


I chose to actually cut the chevron bag in half and use it as a sleeve. The idea behind this card is that it wouldn't be something you mass-produce to send to everyone on your holiday card list. This would be for someone special, maybe someone you wanted to write a longer message to. You could also adhere a photo to the card before tucking it in the sleeve.

The card itself is just a simple 5x7" flat Old Olive card layered with a slightly smaller piece of Very Vanilla. The greeting, stamped in Early Espresso, is from the same set as the poinsettia image. It's called Joyful Christmas (#131802 wood/#131805 clear).


The sleeve for the card is really pretty simple. I just took one chevron bag, cut off the top and bottom (the remaining piece was about 7" wide), and then cut it in half. The embellishment is layered with a Tea Lace Doily, the poinsettia image from Joyful Christmas, linen thread, and that gorgeous glitter word die cut.


Oh yeah, that die cut? About that... By far my favorite item in the Holiday Catalog! :) New dies - called Thinlits. They're similar to Framelits, and they work in the same way. This set - first of many I hope! - is called the Expressions Thinlits (#132171) and includes the words Thankful, Merry, and Love. I die cut the word Merry from some Champagne Glimmer Paper. The poinsettia image is watercolored with Cherry Cobbler and Old Olive inks and the Aqua Painter.

Well, thanks for stopping by today. I hope you'll be back tomorrow for Day Three. I'm planning a cute little set of gift enclosure cards using a super cute holiday sentiment set. Until then...

Happy Stampin'! :)

Monday, July 29, 2013

Christmas in July Week - Day One: Colorful Christmas Card Set

Hello and Welcome to my annual Christmas in July week! Better late than never, I hope! :) Technically, I kicked off the celebration early yesterday with a bonus embossing folder card, but I'm back today to officially start the Christmas festivities.


I wanted to start off this week of projects with something really quick, simple, and super fun. I made a set of two of these little note cards, but you could easily make more. To make these cards so quick and simple, I used the Tag a Bag Kit from the Annual Catalog to create the adorable layered tags. You get enough supplies in the kit for 10 tags like these. I added some Silver Glimmer Paper (not included in the kit) between the small and large tags, but you could just as easily use the Smoky Slate banner stickers that come in the kit. The colors are Bermuda Bay, Crushed Curry, Gumball Green, Smoky Slate, Tangerine Tango, which is what I used to color the images - except I used Pool Party instead of Bermuda Bay because I wanted to have a Pool Party panel for the background of the card. The stamp set is called Color Me Christmas (#131742 wood/#131745 clear) and it has these two images, plus a Christmas tree, Santa, and a reindeer. 


What I love about these cards - which measure 3.5x5 inches by the way (you could use the Note Cards and Envelopes - 20 cards and 20 envelopes for only $5.95!) - is that they're so family friendly. These would be great cards for teachers, church youth group leaders, babysitters... especially if you get your kids involved in making them! Little ones can help choose which tags to match together, and bigger kids can work the Big Shot to emboss the backgrounds, or color the images. The color scheme of the tag kit is bright and fun, and the images are quirky and cartoony, so the coloring doesn't have to be perfect.


Don't forget - all the Holiday Catalog items I'll be using this week will be available on Thursday, August 1st when the Holiday Catalog goes live. Hope you enjoyed this project. See you tomorrow! 

Happy Stampin'! :)

Sunday, July 28, 2013

Embossing Folder Love!

Hey there! So... no Start-to-Finish Sunday video today. (Sorry!) Why, you ask? Well, because I'm kicking off my annual Christmas in July week a day early! Today is my Intro post over on Catherine and Cathy Create, and I decided to share one of my favorite things: Textured Impressions Embossing Folders from Stampin' Up! And I wanted to create a bonus card featuring an embossing folder and some of the new Holiday Catalog goodies that you'll be able to shop for on August 1st! So check it out...


I used one of my favorite embossing folder techniques on this card. It's so easy and just takes a few extra seconds. You just ink the folder itself either with a brayer, or by swiping the ink pad directly across the folder, carefully place your cardstock inside, and run it through your Big Shot just like normal. (Check out my video tutorial on this technique.) For this card I used the Beautifully Baroque embossing folder.


Here's a close-up of the results of this technique. Isn't that pretty? And it's even more stunning in person. I love it with this tone-on-tone effect (this is Baked Brown Sugar cardstock and ink), or you can mix and match colors for a totally different look.

And here's where that sneak peek comes in! :) Three things here that you'll be able to shop for on August 1st - that's this Thursday! You can see here two stamp sets, Wonderful Wreath (#132748 wood only) and Christmas Messages (#131790 wood/#131793 clear), and one of the DSP collections, Season of Style. So pretty!


And this is the card I shared on Catherine and Cathy Create. I just love how a little bit of embossing can instantly elevate a simple card! If you've already been over to Catherine and Cathy Create, you may be here because I promised a supply list for this card. So, without further ado, here it is! Thanks for stopping by, and I hope you'll be back tomorrow through Friday for 5 wonderful Christmas in July projects! :)


Eat the Cake Birthday Card Supplies


Tuesday, July 31, 2012

Christmas in July Week - Day Seven: Partial Die Cutting

Hello friends! Tomorrow is the day! The 2012 Stampin' Up! Holiday Catalog goes LIVE to the public! I'd like to thank you for joining me for the past 7 days. I hope you've enjoyed the projects I shared and that you're as excited about the Holiday Catalog as I am! :)


For the last day of Christmas in July, I wanted to share an awesome die cutting technique I learned from Jennifer McGuire during the recent Stretch Your Stamps class at Online Card Classes. It's called partial die cutting. This card was my first time trying the technique and I can't wait to experiment with it some more! Check out how it's done in the video below or on YouTube.


Thanks again for joining me for the past 7 days. Make sure you visit my website tomorrow to check out the Holiday Catalog in it's entirety! :)


2012 Holiday Catalog Supplies:
#129950 Ornament Keepsakes Bundle clear mount (includes stamp set and coordinating Framelits dies for a 15% discount!)
(#129949 wood mount)
#126908 Snow Festival DSP
#127943 Make a Mitten clear mount (snowflake stamp)
(#127940 wood mount)
#128930 Border Banter clear mount (Merry sentiment)
(#128927 wood mount)

2012-2013 Main Catalog Supplies:
#100730 Whisper White cardstock
#126841 Primrose Petals cardstock
#126960 Baja Breeze ink
#126966 Cherry Cobbler ink
#126858 Primrose Petals ink
#123125 Cherry Cobbler baker's twine
#119882 Scallop Edge Border punch
#119247 Basic Pearls
#126856 2012 In Color markers (Gumball Green)

Monday, July 30, 2012

Christmas in July Week - Day Six: Core'dinations Card

Today I wanted to share a card showcasing one of my favorite new items from the Holiday Catalog. Are you familiar with Core'dinations? Well they've partnered with Stampin' Up! to make available their amazing colored core cardstock in three colors. The cardstock is one color on the inside, then it's coated with a contrasting color. So when you sand or distress it, the core color shows through! I love this stuff! :) So far it's offered in Early Espresso, Gumball Green, and Cherry Cobbler. But I, for one, hope more colors are to come!


I made a video too - it's pretty much this card start to finish! :) Check it out below, or on my YouTube channel. Tomorrow is Day Six and it's the day before the Holiday Catalog goes live!! See you then!


Happy Stampin'! :)


2012 Holiday Catalog Supplies:
#127848 Early Espresso Core'dinations cardstock
#128129 Heart of Christmas stamp
#129727 Watercolor Winter clear mount
(#129724 wood mount)
#126901 Candlelight Christmas DSP
#129367 Stampin' Sanding Block
#127819 Lacy Brocade Textured Impressions embossing folder

2012-2013 Main Catalog Supplies:
#120953 Crumb Cake cardstock
#101650 Very Vanilla cardstock
#123002 2011 In Color markers (Lucky Limeade)
#119702 Brights markers (Real Red)
#126979 Chocolate Chip ink
#127003 Apothecary Accents Framelits dies


Sunday, July 29, 2012

Christmas in July Day Five *Meets* Start-to-Finish Sunday #3

I promised to keep up with Start-to-Finish Sundays, so I'm lovin' that STFS #3 overlaps with Christmas in July! :)

Today I made a fun little card and treat in one - all the same functions of a card, including plenty of space to write a personal note, and it holds a yummy packet of hot cocoa mix.


Cute, right? :) I really wanted to stray from the traditional red and green Christmas color palette too - I love that you could switch out the sentiment really easily and still have a great non-denominational treat for someone.

Check out the video below, or over at my YouTube channel.


Happy stampin'! :)


2012 Holiday Catalog Supplies: 
#127943 Make a Mitten clear mount
(#127940 wood mount)
#127824 Mitten Builder punch
#128033 Greetings of the Season clear mount
(#128030 wood mount)

2012-2013 Main Catalog Supplies:
#126856 2012 In Color markers (Gumball Green)
#123002 2011 In Color markers (Pool Party)
#119702 Brights markers (Daffodil Delight
#126840 Gumball Green cardstock 
#122924 Pool Party cardstock
#119683 Daffodil Delight cardstock
#126944 Daffodil Delight ink
#119882 Scallop Edge border punch
#122941 1/8" mini silver brads
#124262 white baker's twine
#126982 Pool Party ink
#102283 Versamark ink     
#109132 white embossing powder
#110755 Tombow Mono multi glue 

Christmas in July Week - Day Four: Flocked Window Tag

It's the weekend! Yay! And it's almost midnight and I really need to go to bed, so just a super quick post today. I decided to make a tag for today's project, but I wanted to do something fun and different so I cut a window in the middle of the tag and used the flocked window sheet from the Candlelight Christmas DSP collection to mount a "floating" Christmas tree.


And here's the video! That's all for today! :)


2012 Holiday Catalog Supplies:
#129946 Scentsational Season Bundle clear mount (includes Scentsational Season stamp set and Holiday Collection Framelits dies)
(#129945 wood mount bundle)
##126901 Candlelight Christmas DSP
#129021 Window Frames Framelits dies

2012-2013 Main Catalog Supplies:
#126840 Gumball Green cardstock
#126861 Gumball Green ink
#100730 Whisper White cardstock
#109070 Whisper White taffeta ribbon
#123125 Cherry Cobbler baker's twine
#118592  Tiny Tags clear mount
(#118592 wood mount)
#126980 Basic Black ink
#126949 Real Red ink
#117190 Jewelry Tag punch   
#127555 Vintage Faceted designer buttons 
#126944 Daffodil Delight ink 

Friday, July 27, 2012

Christmas in July Week - Day Three: Snow Angel Card

Happy Friday! Welcome to Day Three of Christmas in July! No video today, but I do have a super cute card to share with you.


I am in love with this stamp set! It has the cutest images ever! It's called Wonderful Winterland, and features super cute kids doing all sorts of wintertime activities. (The sentiment is from For the Birds.) I also used a few of the patterns from the Snow Festival DSP pack to paper piece the diagonal stripe background - I love the color combination in this paper!


I colored the stamped image with a blender pen. I took the color combination straight from the DSP. It's a totally fool-proof way to choose colors for a card project. Even if I'm not actually using the paper on the project, I'll often pull color palettes from DSP collections.

OK, super quick, one more thing to share with you. This card is based on a sketch from the submission call for Paper Crafts magazine's Jan./Feb. 2013 issue. I didn't find out about it in time to actually submit (wish I had!) but I thought the sketch was really fun and creative. As you can see, I changed up the sketch quite a bit, which is why I wanted to show you the original sketch. Sketches are a great source of inspiration, but don't forget you can switch things up!
Thanks for stopping by today. Come on back tomorrow for another Christmas in July project!

Happy Stampin'!

2012 Holiday Catalog Supplies:
#123819 Wonderful Winterland clear mount stamp set
(#123817 wood mount)
#126908 Snow Festival Designer Series Paper

2012-2013 Main Catalog Supplies:
#126407 For the Birds clear mount stamp set
(#126405 wood mount)
#100730 Whisper White cardstock
#120953 Crumb Cake cardstock
#126841 Primrose Petals cardstock
#126840 Gumball Green cardstock
#111352 Baja Breeze cardstock 
#119685 Cherry Cobbler cardstock 
#126861 Gumball Green ink
#126858 Primrose Petals ink
#126978 Soft Suede ink
#126960 Baja Breeze ink
#102845 Blender Pen    
#109070 Whisper White Taffeta ribbon
#104199 Linen Thread
#101406 Staz-On Ink
#127555 Vintage Faceted designer buttons
#100037 Blush Blossom marker